
We took Nirvana out for a sail in Sunday’s beercan. We didn’t win the race, but I won the latest battle in mending the jib. My latest repair held nicely in 20+ knot winds. 👍🏼

We took Nirvana out for a sail in Sunday’s beercan. We didn’t win the race, but I won the latest battle in mending the jib. My latest repair held nicely in 20+ knot winds. 👍🏼
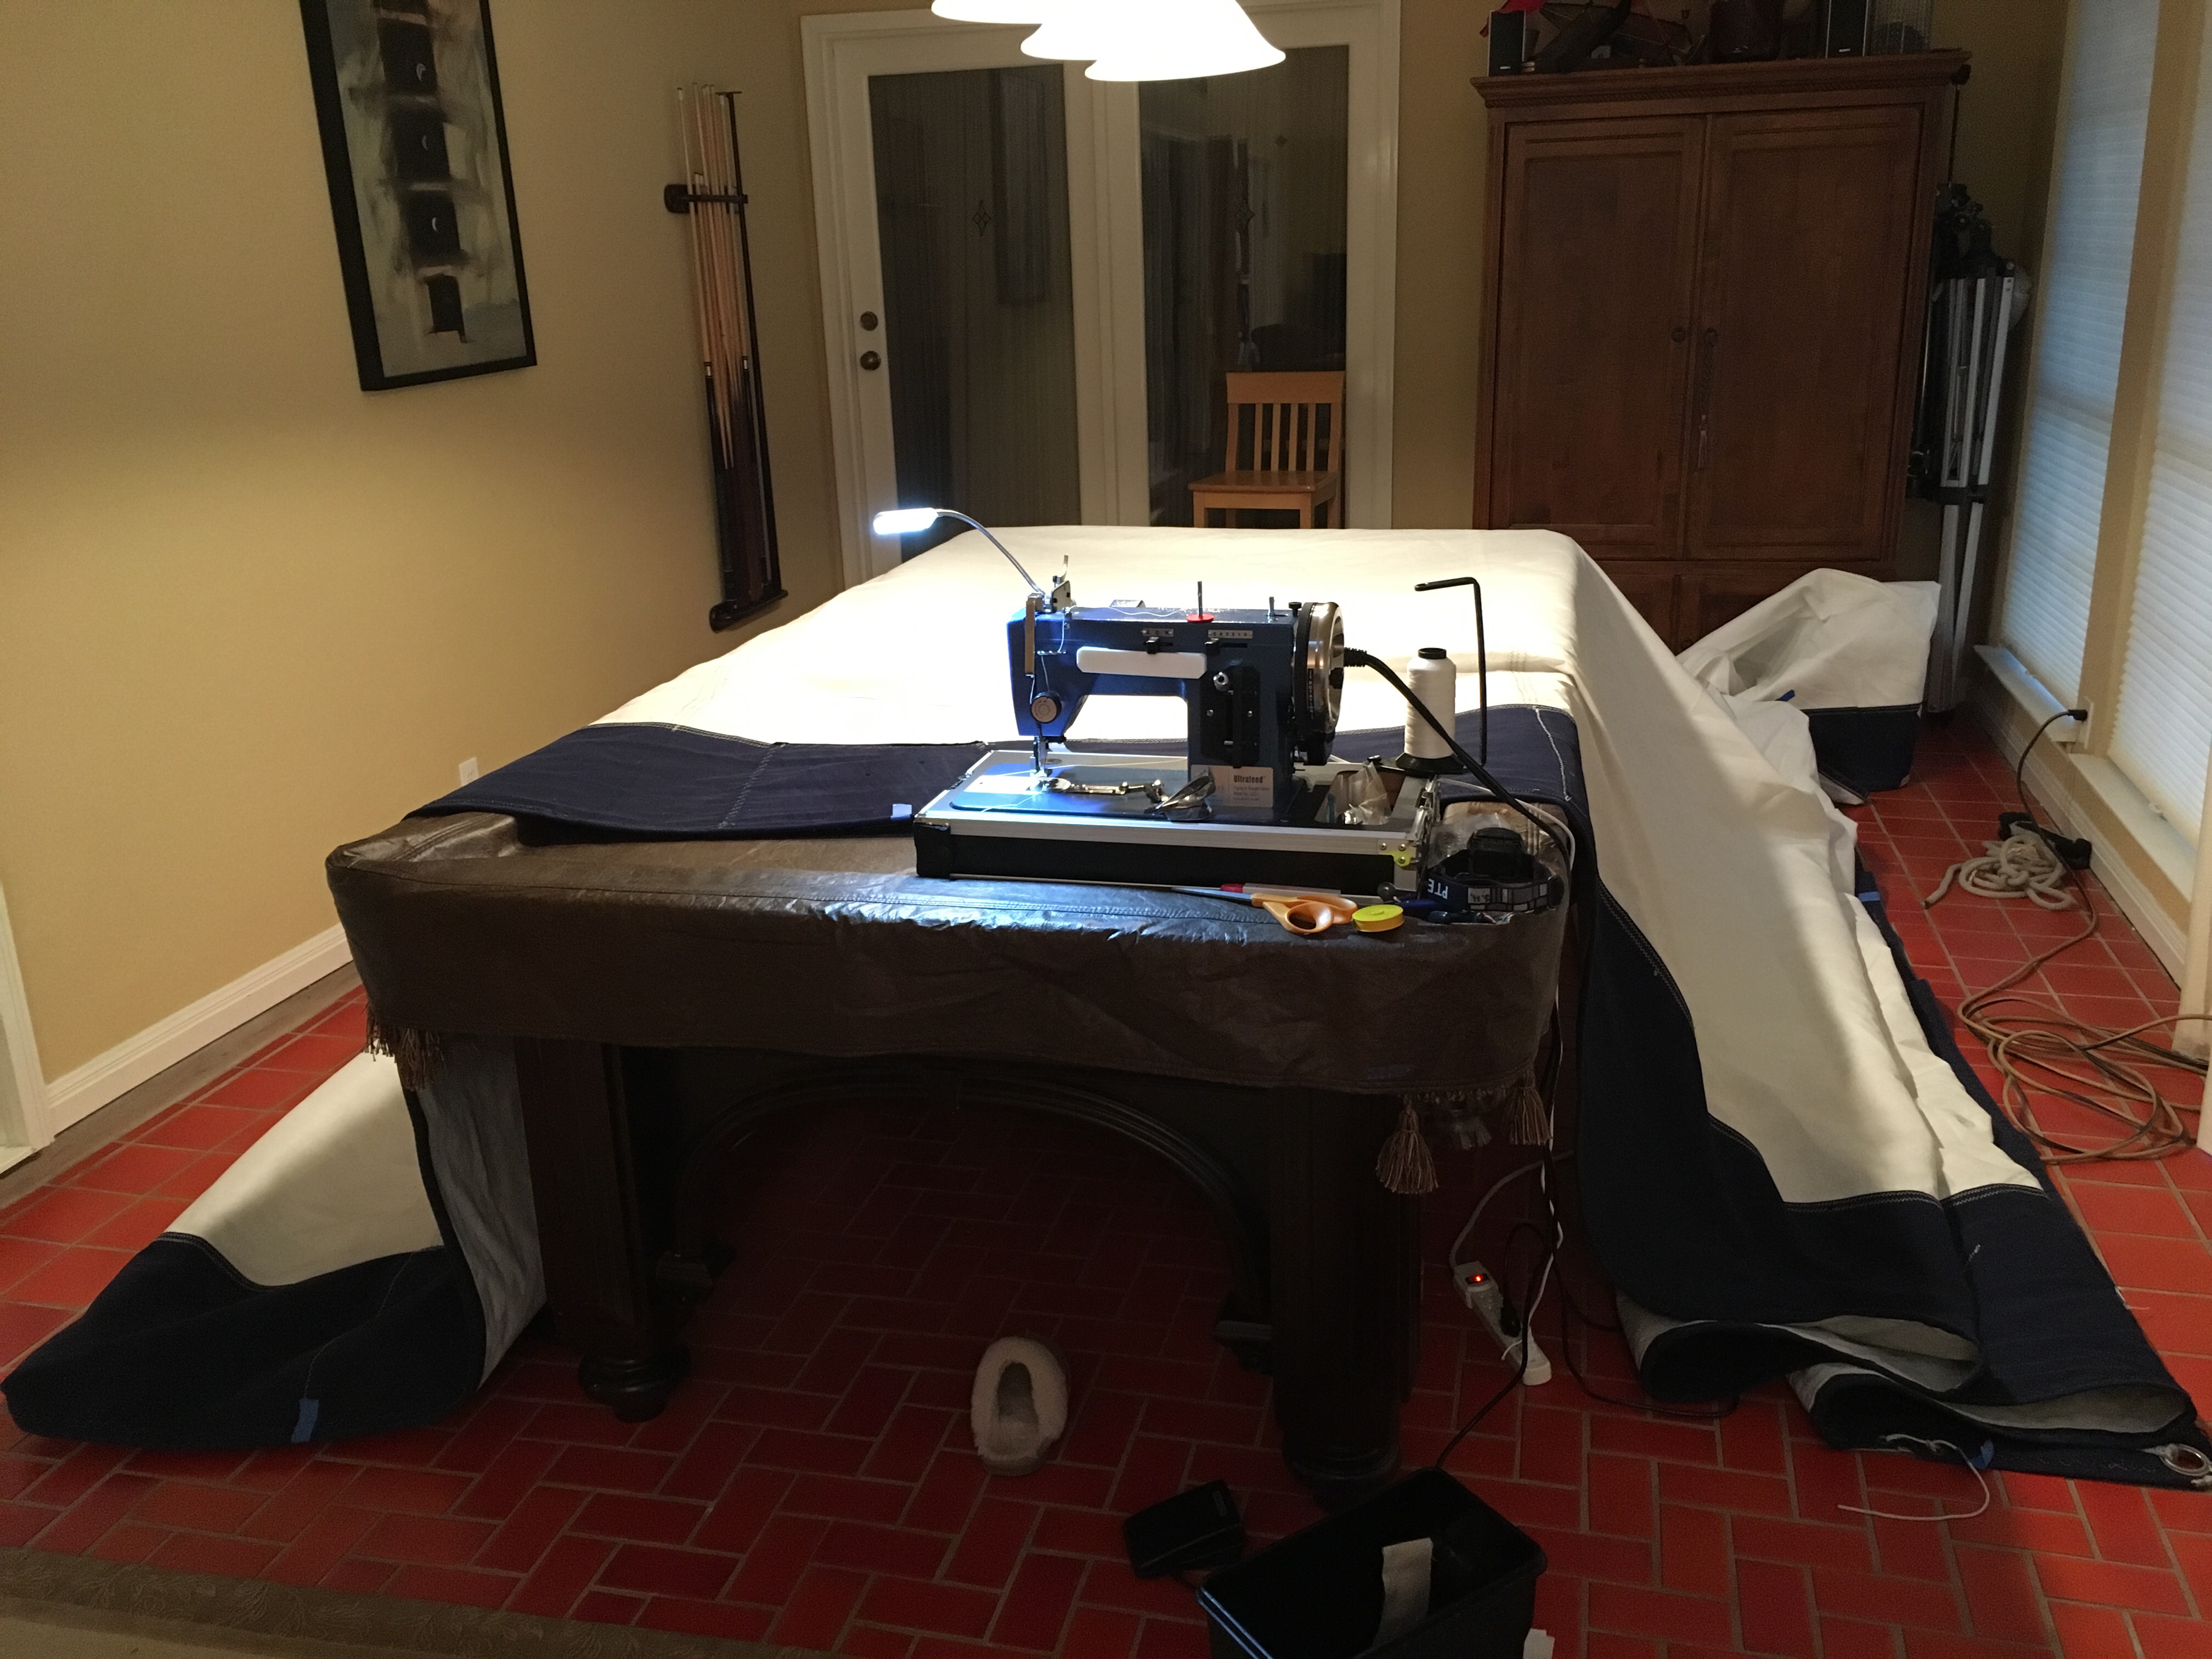
I finally got a couple of days to work on our jib. The sailcloth is in good shape for the most part. Except for the section along the leech that gets beat against the shrouds every tack, and pressed tight against the spreaders when close hauled. It has torn in several places.
After a discussion with the sailmaker at Sailrite I decided to go for a repair that replaced the first 30” or so on the leech end of 3 panels of the sail. Also patched the beat up sunbrella sun cover and made new spreader patches. And replaced a few well worn webbing strips at the head and clew as well.

It took me about 2 full days of my slow but steady mode of work. Also using PTFE thread in my LSZ-1 is a huge pain in the aft, but it’s a necessity for the UV-exposed stitching.

But it’s done and I like how it came out. And I have my living room back. Fingers crossed that it does the trick 🤞🏼
While I was doing this project, Monte was rebuilding and installing our autopilot wheel drive unit. ✅ and ✅
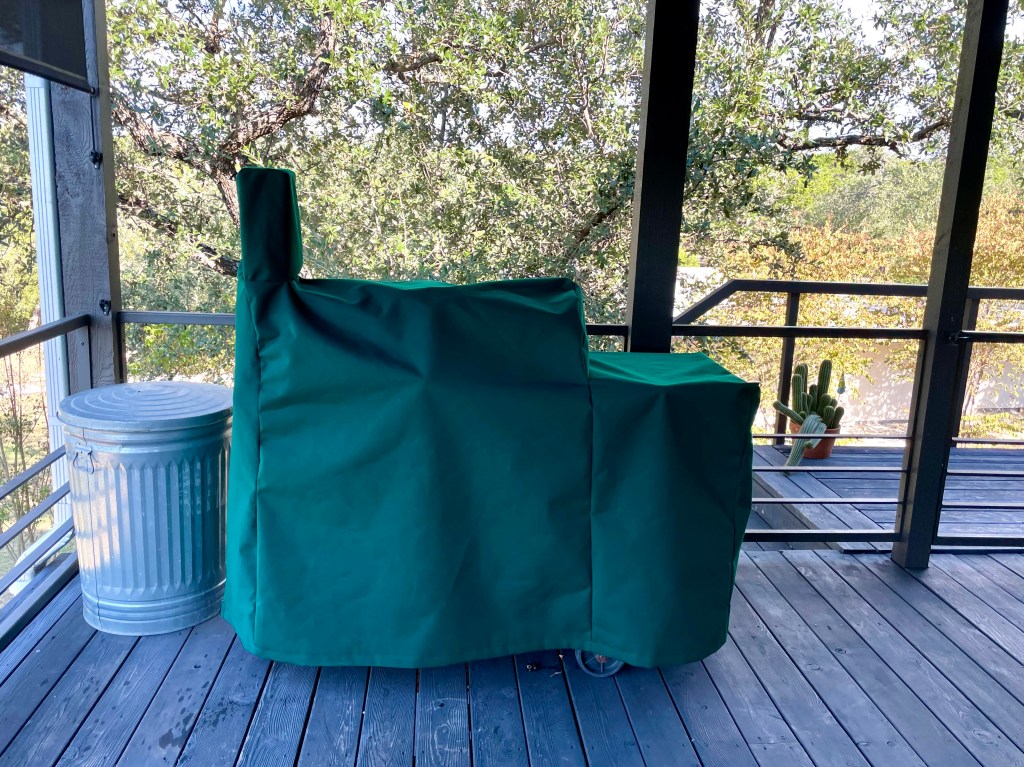
I just finished a cover for a smoker/grill for someone who lives out near Marble Falls. It was quite the puzzle requiring some mental gymnastics to get from taking measurements, to making a pattern, to assembly. It turned out great, I think.
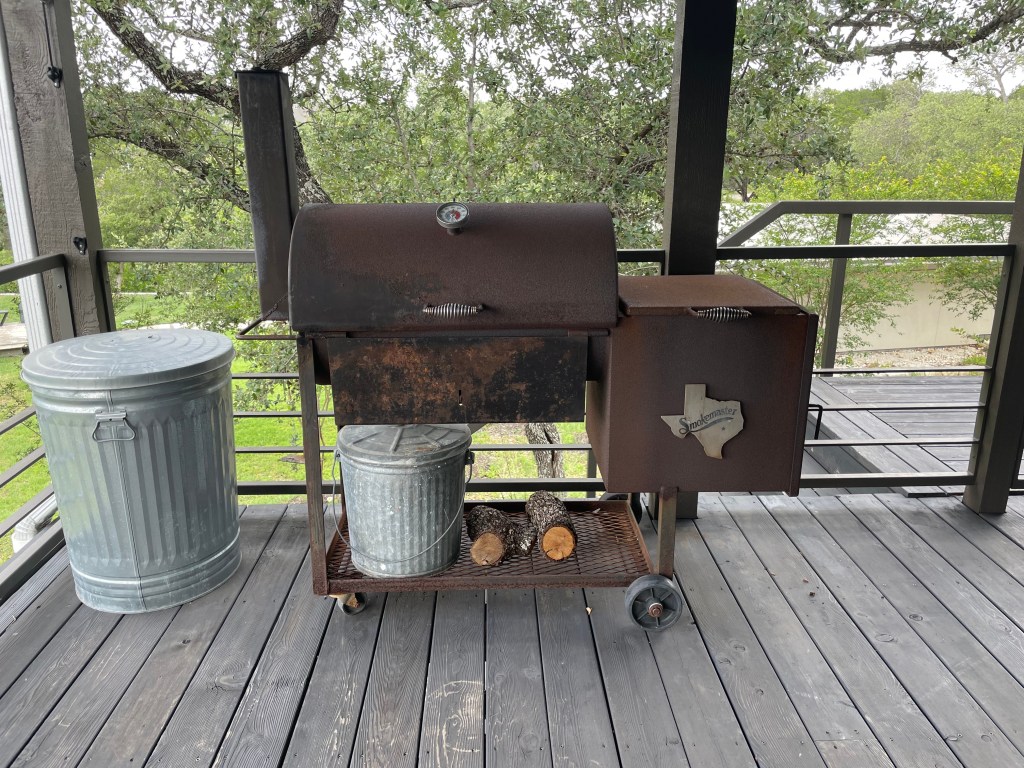

I had to visit the grill several times. It’s a 45-minute drive from my house, which takes me right past Balcones Canyonlands National Wildlife Refuge. So I popped in a couple of times to take in the view.


✅ That item is crossed off the list. Now, on to mending our jib (again).
As Monte likes to say, every time we go to the boat to cross something off the todo list, we add 2 more things to the list.
On Monday we went to the marina to install 3 new halyards and new jib sheets on Nirvana. When we lowered the jib to change the halyard, I found a 2’ long tear along the edge of the sunbrella cover. So we rolled it up and brought it home.
No more over-sheeting the jib against the spreaders, please. It’s not the America’s Cup…


Yesterday I laid it out and mended it; should be good for a while. I ripped off the sunbrella cover, sandwiched the tear between 2 layers of new adhesive-backed 6 oz dacron, sewed it down several times, and then sewed the sunbrella back down.
One step forward…
A year ago, it was anyone’s guess how 2021 would roll out after the cluster that was the year 2020. Today I paused to reflect on a few of the memories I captured from the last twelve months.
January – I started to direct my energy towards making things and sewing. I asked Monte to make me a rack for my growing collection of spools of thread. It turned out perfect, as usual, and has been well used by me over the last 12 months.

February – The deep freeze descended upon Texas. We were incredibly lucky to not have lost power during the prolonged freeze. So many people were really hurting during the weeklong outages. I can’t deny that I loved the temporary snowscape around the house. But I was happy to see it go.

March – The power across the state eventually came back on. The weather warmed up. Things started to bloom. The leaves fell and were raked up. I think we set a record for leaf bags set out on the curb. The City of Austin yard waste collection crew even took a picture of our curbside menagerie.

April – Incredibly, a year after this shit-storm started, COVID vaccines were available to the masses, and we got in line. For both of us, the reactions were pretty mild. The worst thing I can report is a temperature of 100 degrees F.

May – I flew to Charleston to help Lori take Trident north to Annapolis. We had some great days and nights on the water, including several legs on the outside. Sadly, my precious little Keeto died while I was away. Nearly 10 years old, it was still too soon. I’m sorry I wasn’t there for my sweet baby bird. And I’m sorry Monte had to go through it alone. It still brings a tear to my eye. He was just the best bird ever.

June – Nirvana received lots of TLC. A prolonged bottom job. New batteries. Scheduled maintenance undertaken by me and Monte. Inverter replacement. Cushion repairs. Some new running rigging. And many hours with friends and family spent on her this year.

July – We had fun family visits this month; the first since the pandemic descended. And, as we do every year, we took a boatload out on Lake Travis to watch the July 4th fireworks.

August – Monte and I continued enjoying Nirvana and the lake throughout the summer. One week, we spent several days sailing 30 miles upstream, anchoring up around mile marker 44. Our goal was to watch the Perseids meteor shower. We did see some meteors. It was just nice to be out and about on the boat so much this summer.

September – We crewed for Kurt & Kevin for the Austin Yacht Club Fall Series Regatta on Camelot. We helped them nab 2nd place for their class in the end. Huzzah!!

October – I flew up to Baltimore to join Lori on Trident for the Annapolis Sailboat Show, my first. This was more of a for-fun trip than a move-the-boat trip, and I really enjoyed the two day trip we took sailing to St. Michaels and back across Chesapeake Bay. After the boat show, we drove back together to Austin, stopping at 4 US National Parks along the way. Amazing!

November – We enjoyed more time out and about this fall. Monte took me curling for my birthday. We both had loads of fun. And I think we’ll do it again!

December – Wow, the year flew by. Again. We took another boatload out for the Christmas boat parade. Unfortunately, COVID fears are starting to seep back into our lives. But I really hope that by this time next year there are many more fun outings and visits under my belt. I just can’t take another lockdown.

Time flies. We are immensely blessed. It’s easy to complain about the events swirling around us, but I’m focused on celebrating the small day-to-day good times that we spend together and with friends and family.
I wish you all an amazing, healthy, and happy 2022.
Last year one of the catboat’s trailer tires wore out, due mostly to UV damage, and sitting on the dirt. It now has a new set of radials, for which Monte requested covers.
Today I got around to making them, out of captain navy sunbrella. Voila! The squirrels better not mess with these!

Project #2 was a new grill cover for S/V Trident’s Magma grill out of forest green sunbrella reclaimed from one of Lori’s old dodger window cover panels.

Now I guess I have no more excuses to keep me from finishing my taxes…
🙂
My latest build request to Monte was a thread-spool rack for my work closet. My projects continue to expand, and my thread inventory has become an unmanageable pile of spools. I also want to be able to store each bobbin with its corresponding spool of thread, since it’s hard to tell the difference between V-69 and V-92 thread sizes; and navy blue, black and dark green start to look the same to my old eyes. So, the top of each dowel is tapered so bobbins can be stored with each spool. I can also use it to store my growing collection of binding tape, basting tape, cord, and webbing. Voila!

It’s perfect.
Today was the day to re-raise the mast on Julie & Ryan’s boat. New windex, new lights, new halyards, new topping lift, new flag halyard, new sheaves, new wiring, new switches, refurbished outboard motor, replaced bulkhead mid-ships in the salon, chain plates reinforced, and some much-mended sails and boat canvas. I can’t wait to get out on the lake with these sailors. Next up: installing the boom, mainsail, and jib. Then we’ll take her for a sail!

I have been keeping my year-old Sailrite sewing machine busy with boat canvas and sail projects, to make way for the next ones on my list.

Finished projects:
Next projects:
Bring it on!
I knocked out a quick project today as rain soaked the yard. It’s a bag to hold a 3L boxed-wine bladder. Boats don’t much like things made out of cardboard; roaches do. So we don’t bring cardboard on-board. This bag will hold, hang, and dispense the wine instead, so we can toss the box for recycling. Yes, that’s right, I just ooze class. 🙂

I just finished a new canopy cover for my friend, Irene’s, garden swing. I popped over this morning and we put it on. Looks great!

Time has flown by since we took Nirvana’s mainsail home at the beginning of December. But we’ve not been idle. We’ve had a lot going on; a few visits from family and friends, an Atlantic coast boat delivery, the holidays, the bathroom remodel, yardwork, life, etc. But I think I’m almost ready to start repairing the main.
I’ve made a scale drawing of the sail and all its detail (including seams, layers of dacron, batten pockets, luff and leech tape, direction of the warp & weft/fill – or weave – of each piece of the sail’s construction, etc). On top of that, I marked the location of the damaged areas that need to be repaired. Using this, I can figure out a strategy of what pieces to replace, the dimension of each piece, and then lay them out on scale drawings of 54″ wide dacron yardage so I can figure out how much I need to cut out all the pieces with the weave in the required direction.
Nirvana’s sail is a bit unusual – at least for a US boat – in that it has a furling boom (a Forespar LeisureFurl furling boom). It’s a very nice upgrade that is reportedly prevalent in Australia and New Zealand sailboats. We like the convenience and the fact that our furling boom allows us to have full battens in our main. As I’m preparing to repair the mainsail, I’ve learned that sails for LeisureFurl booms are built with multiple layers, or plies, toward the leech end of the sail, which is required to ensure proper furling of the main. It just makes things a bit more interesting (complicated), as that is where the majority of the damage is. I’ve also spent time on the phone with Sailrite and Forespar to ensure I use the right weight of dacron for the replacement pieces.
The repairs I plan to make to the mainsail include:
– Replacing the bolt rope tape on the luff of the sail. This goes into a track on the aft-side of the mainmast as the sail is raised and lowered. It is well worn due to wear and UV damage.

– Replacing the dacron tape along the leech of the sail. This is well worn and cracking due to wear and UV damage.

– Replacing areas of varying widths along the entire leech of the sail where UV damage has degraded much of the top ply of dacron. The previous owner neglected to replace a worn sail cover before selling her, probably for a couple of years, resulting in a wide swath of cracked and torn dacron that remained exposed to the sun when the main was furled.

I’ve been taking my time, as sail work is new to me, and I have a lot to learn. The first 2 sets of repairs are straightforward. The third set of repairs is non-trivial and essentially requires replacement of much of the top 2 plies of the sail.
The picture below shows the drawing I’ve made of the port-side of Nirvana’s approximately 13 1/2′ x 38′ mainsail. The brown lines represent the batten pockets that are on top of all the layers of dacron and the luff & leech tape. I essentially need to remove and replace the pink and blue layers of dacron on the aft-end of the sail.

Because of the order in which the parts of the mainsail are sewn, I’ll have to pull up the existing batten pockets to remove the worn pieces of the sail, then sew in the new pieces of dacron, and then sew the batten pockets back down, before sewing the luff and leech tape on. I’ll also have to replace a couple of the numbers on the sail when all the repairs are done, as some of the sections that need replacement are under the sail numbers.
This is definitely more complicated than the repairs I made to the jib a few months back. But, I’m cautiously optimistic that I can do this. Stay tuned to see how it turns out.
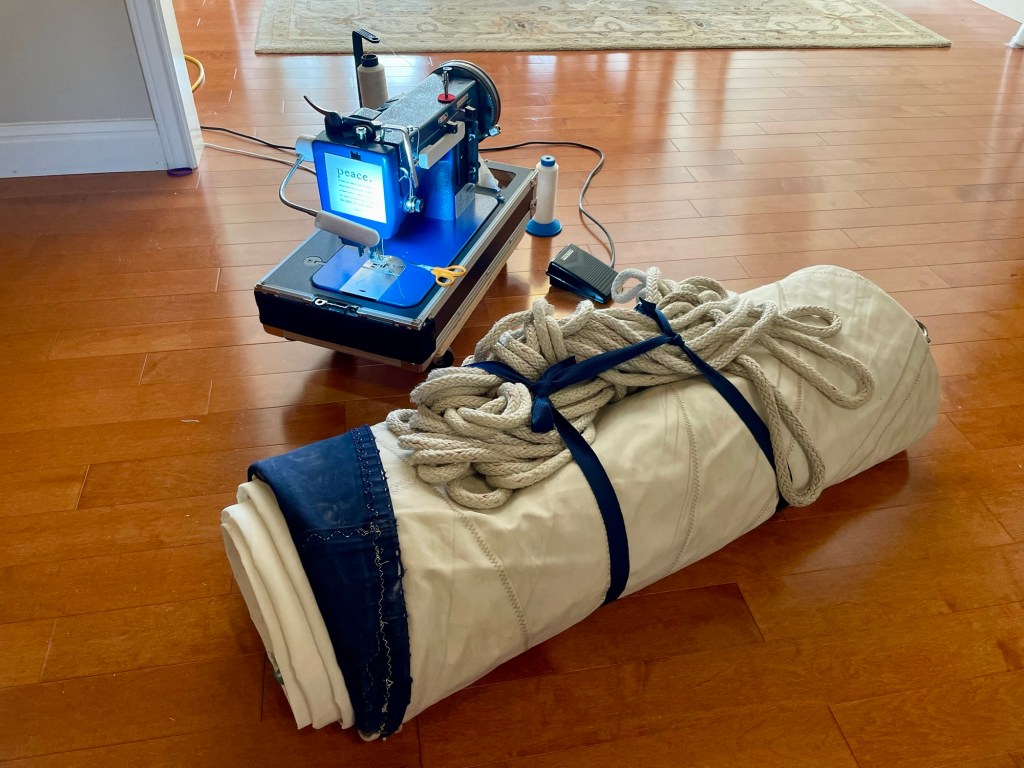
We brought home the jib from Nirvana. It has several tears and wear that needs some TLC. I’m setting out to mend this 42′ x 17′ triangular mass of Dacron. Who will win? Stay tuned.
I think I’m on a roll with this boat canvas thing. I made a companionway cover for Marty & Sue’s boat. I love the color. It’s insulated, with a layer of Reflectix between two layers of marine Sunbrella. Stitching it was a bit like wrestling a bear at times, but my new machine handled it well. 🙂

