Two more canvas projects.

Last year one of the catboat’s trailer tires wore out, due mostly to UV damage, and sitting on the dirt. It now has a new set of radials, for which Monte requested covers.

Today I got around to making them, out of captain navy sunbrella. Voila! The squirrels better not mess with these!

Project #2 was a new grill cover for S/V Trident’s Magma grill out of forest green sunbrella reclaimed from one of Lori’s old dodger window cover panels.

Now I guess I have no more excuses to keep me from finishing my taxes…

Clearing the decks.

I have been keeping my year-old Sailrite sewing machine busy with boat canvas and sail projects, to make way for the next ones on my list.

Finished projects:

  • mainsail repairs for Julie & Ryan’s yet-to-be-named Catalina 25
  • new LifeSling 2 cover for Nirvana to match all the other sunbrella on-board
  • instrument panel cover v3.0 for Trident (this one can be tied to the boat so it won’t blow away in 50+ knot winds)
  • sailcover repairs for Cupholder
  • new mainsail luff-tape cover for Nirvana‘s furling boom
  • tool roll-ups for Monte, one for his metric wrenches, and one for his SAE wrenches

Next projects:

  • custom mattress covers & sheet sets for Nirvana‘s fore and aft cabins
  • sailcover repairs for Catalina 25
  • tiller cover for Catalina 25
  • design and make custom bags from an old Hunter mainsail that marina-friends Thomas and Monique gifted me
  • new stern-rail seat cushions for Nirvana
  • repairs to Nirvana‘s salon cushions
  • shade cloth rollups for Nirvana‘s bimini

Bring it on!

Rainy day project.

I knocked out a quick project today as rain soaked the yard. It’s a bag to hold a 3L boxed-wine bladder. Boats don’t much like things made out of cardboard; roaches do. So we don’t bring cardboard on-board. This bag will hold, hang, and dispense the wine instead, so we can toss the box for recycling. Yes, that’s right, I just ooze class. 🙂

Swing into spring.

I just finished a new canopy cover for my friend, Irene’s, garden swing.  I popped over this morning and we put it on.  Looks great!

IMG_0324 (1)

Companions’ cover.

I think I’m on a roll with this boat canvas thing. I made a companionway cover for Marty & Sue’s boat. I love the color. It’s insulated, with a layer of Reflectix between two layers of marine Sunbrella. Stitching it was a bit like wrestling a bear at times, but my new machine handled it well. 🙂

Cover-up.

My latest canvas-work project… a cover for the grill off the back of the boat.  Voila!

IMG_9412

Making my own pattern was definitely the hardest part.

If Monte stands around too long in one place, I’ll make a cover for him, too!

So, sew.

I’m slowly working down my boat sewing project list. I made 5 winch covers for our jib sheet winches, house top winches, and windlass. I used Sailrite’s pattern and instructions as a guide. My takeaway: it is not easy to sew a circle onto a rectangle.

I also replaced our frayed and yucky bimini straps, having to sew a loop and attach the fastener-buckle thingie before installing.

Bring on the next project!

Canvaswork bits & bobs.

I have been entertaining / vexing myself for the last week or two with a further foray into learning to sew boat-canvas projects.  This time, it was two projects for Lori and Trident; a propane canister bag in her Sunbrella color (forest green), and a lee-cloth made out of Phifertex, bordered with Sunbrella.  A lee-cloth is a sheet of fabric attached to the open side of a settee in the salon of a sailboat; the purpose of which is to keep a sleeping sailor in her berth, as opposed to flying across the salon during a rough passage.

We could have used one on the crossing from Florida to Texas back in February.  On that trip, Joe was thrown from the settee while asleep during his off-watch time and hit his face on the other side of the salon.   I’ve never seen nor used one, but Lori and I did a bit of prototyping last time I was down in Kemah and I came home with a sort of pattern.  Her settee is about 6 1/2 feet long by 20+ inches deep.  We agreed that a 4′ x 4′ finished dimension would work, with a field of Phifertex, bordered by about 3 1/2″ of Sunbrella on front and back.  Lori also asked for a run of Sunbrella up the middle, to give it a bit more structure when strung up, and a pocket for phone, glasses, headlamp, etc.   It will be anchored on the boards below the settee cushions and secured fore and aft above the cushions, by smallstuff tied to grommets.   Lori picked Phifertex because it is an open mesh vinyl fabric, to allow for airflow.  I found it to be a great fabric to work with.   I’ll be ordering some for my next project – new halyard bags for Nirvana.  Stay tuned.

And…. Voila! <<use your imagination to envision this lee-cloth being displayed against the settee of a sailboat, and not the couch in my living room>>  The pocket ended up a bit wonky, as I was running out of material, but it’ll work.

IMG_6223

If you’re not into sewing or canvaswork, you may want to stop reading now.  Because I will document here some of the things I learned working with Sunbrella using my valiant, but limited, Kenmore model 385 sewing machine – for no reason other than I would have loved to have known some of this ahead of time, as opposed to learning by trial and error.

  • A walking-foot sewing machine (which mine is not) is really the right tool for the job.  As it consistently pulls the fabric from above and below at the same time.  My home sewing machine only has traditional feed dogs below.  As a result, the stitches are rarely consistently spaced, due to variations in how fast/smoothly the fabric feeds under the needle.  An industrial sewing machine is designed to handle the fabric thickenesses I’ve been doing and much more, with much more ease and less pain and suffering (and swearing) and re-doing on the part of the operator.
  • Longer stitch lengths are desirable.  The max stitch length setting on my machine is 4… not sure exactly what that translates to, maybe 4 mm stitch length (?).  But whatever it is, it is not big enough.
  • My Kenmore, surprisingly, has handled everything I’ve thrown at it so far, the max of which was about 6 layers of Sunbrella and 1-2 layers of Phifertex.  Not bad.  I’m using a 110/18 needle with V-92 bonded polyester thread.  If you want beautiful and consistent topstiching, however, you’ll need to spring for a Sailrite or similar walking foot, industrial machine.
  • Pinning through several layers of Sunbrella requires fingertips of steel.  After watching a number of videos, I learned that the pros rarely use pins.  They use double-sided basting tape to hold surfaces of fabric together until they are stitched.   What a great thing!
  • My sewing machine is not rigged to use the ginormous spools of thread canvas work requires, they are too big to sit on the tiny pin on top of the machine for a normal spool of thread.  In addition, the thread has a habit of falling around the bottom of the spool, aka “pooling,” which can mess with your thread tension.  Instead, they need to sit at table level (or lower) and feed up above and then down to the machine.  I don’t know what this doohickey is called, but I’ve seen them on industrial machines, and made one of my own out of a wire clothes hanger, cutting and bending it to do my will.
  • Speaking of tension, whatever the max tension on my machine is, it was not enough for some stitching tasks.  I had to literally pinch the top thread in my right hand to add additional tension so that stitches didn’t loop on top of the fabric for one or two parts of my projects.  I found this to be the case, in particular, when topstitching the webbing that I used on top of the Sunbrella for the propane bag projects.  It didn’t happen when stitching just Sunbrella and/or Phifertex, thankfully.
  • Sunbrella doesn’t like to stay folded very well.  If you run the point of an awl along your fold line, though, it yields a bit more, helping to hold a hem until stitched.
  • A soapstone pencil (a common quilting notion) came in handy for marking Sunbrella.   It marks the fabric nicely, and easily erases with a damp cloth.   I found a #2 lead pencil and eraser worked great for marking the Phifertex.
  • Cutting Sunbrella can be a pain, because it frays.  The right tool for the job is an electric hot knife.  But I stuck it out using only my fabric shears, followed by an application of glue along all the cut edges to minimize fraying.  This took forever to apply and to dry.  Then I took the time to double turn all the hems, so no cut edge was exposed.   If I do much more of this, a hot knife is definitely in my future.

IMG_6224

I’ll stop there.  If you’ve made it this far, thanks for reading!  I hope some of this helps a fellow newbie canvasworker.

Boat run.

We are pet sitting this week – our niece, Julie’s, dog, and Doray & Tom’s parrot.   Because of that, we have been sticking close to home.  But, today we took the opportunity on this beautiful day to take a drive.

We stopped by several vantage points around the lake.  With the emergency flooding situation behind us, Lake Travis is dropping about 1.5 feet a day now, currently at 695′ above mean sea level.   The butterflies were thick today, which makes me very happy – so much of what humans do have hurt their populations over the years.  It’s nice to see them out there despite us.

IMG_6172

I believe these are Queen butterflies, on blue mistflower.  I think I’ll plant some of this in my yard!

We also stopped by the marina to check on our boat.  Our marina’s staff has been doing a wonderful job keeping all the docks floating and clear of obstacles.  They are running a shuttle to the docks for boat owners, since the lake is still flooded, and the water level is still about 15 feet above the parking lot.  Everything looks fine.  Our batteries are doing well (electricity has been off to the docks for 12 days, so far).

I brought my completed propane bag out to the boat and hung it.  It works great, and I found the perfect spot for it.

IMG_6174

Sewing project for the boat.

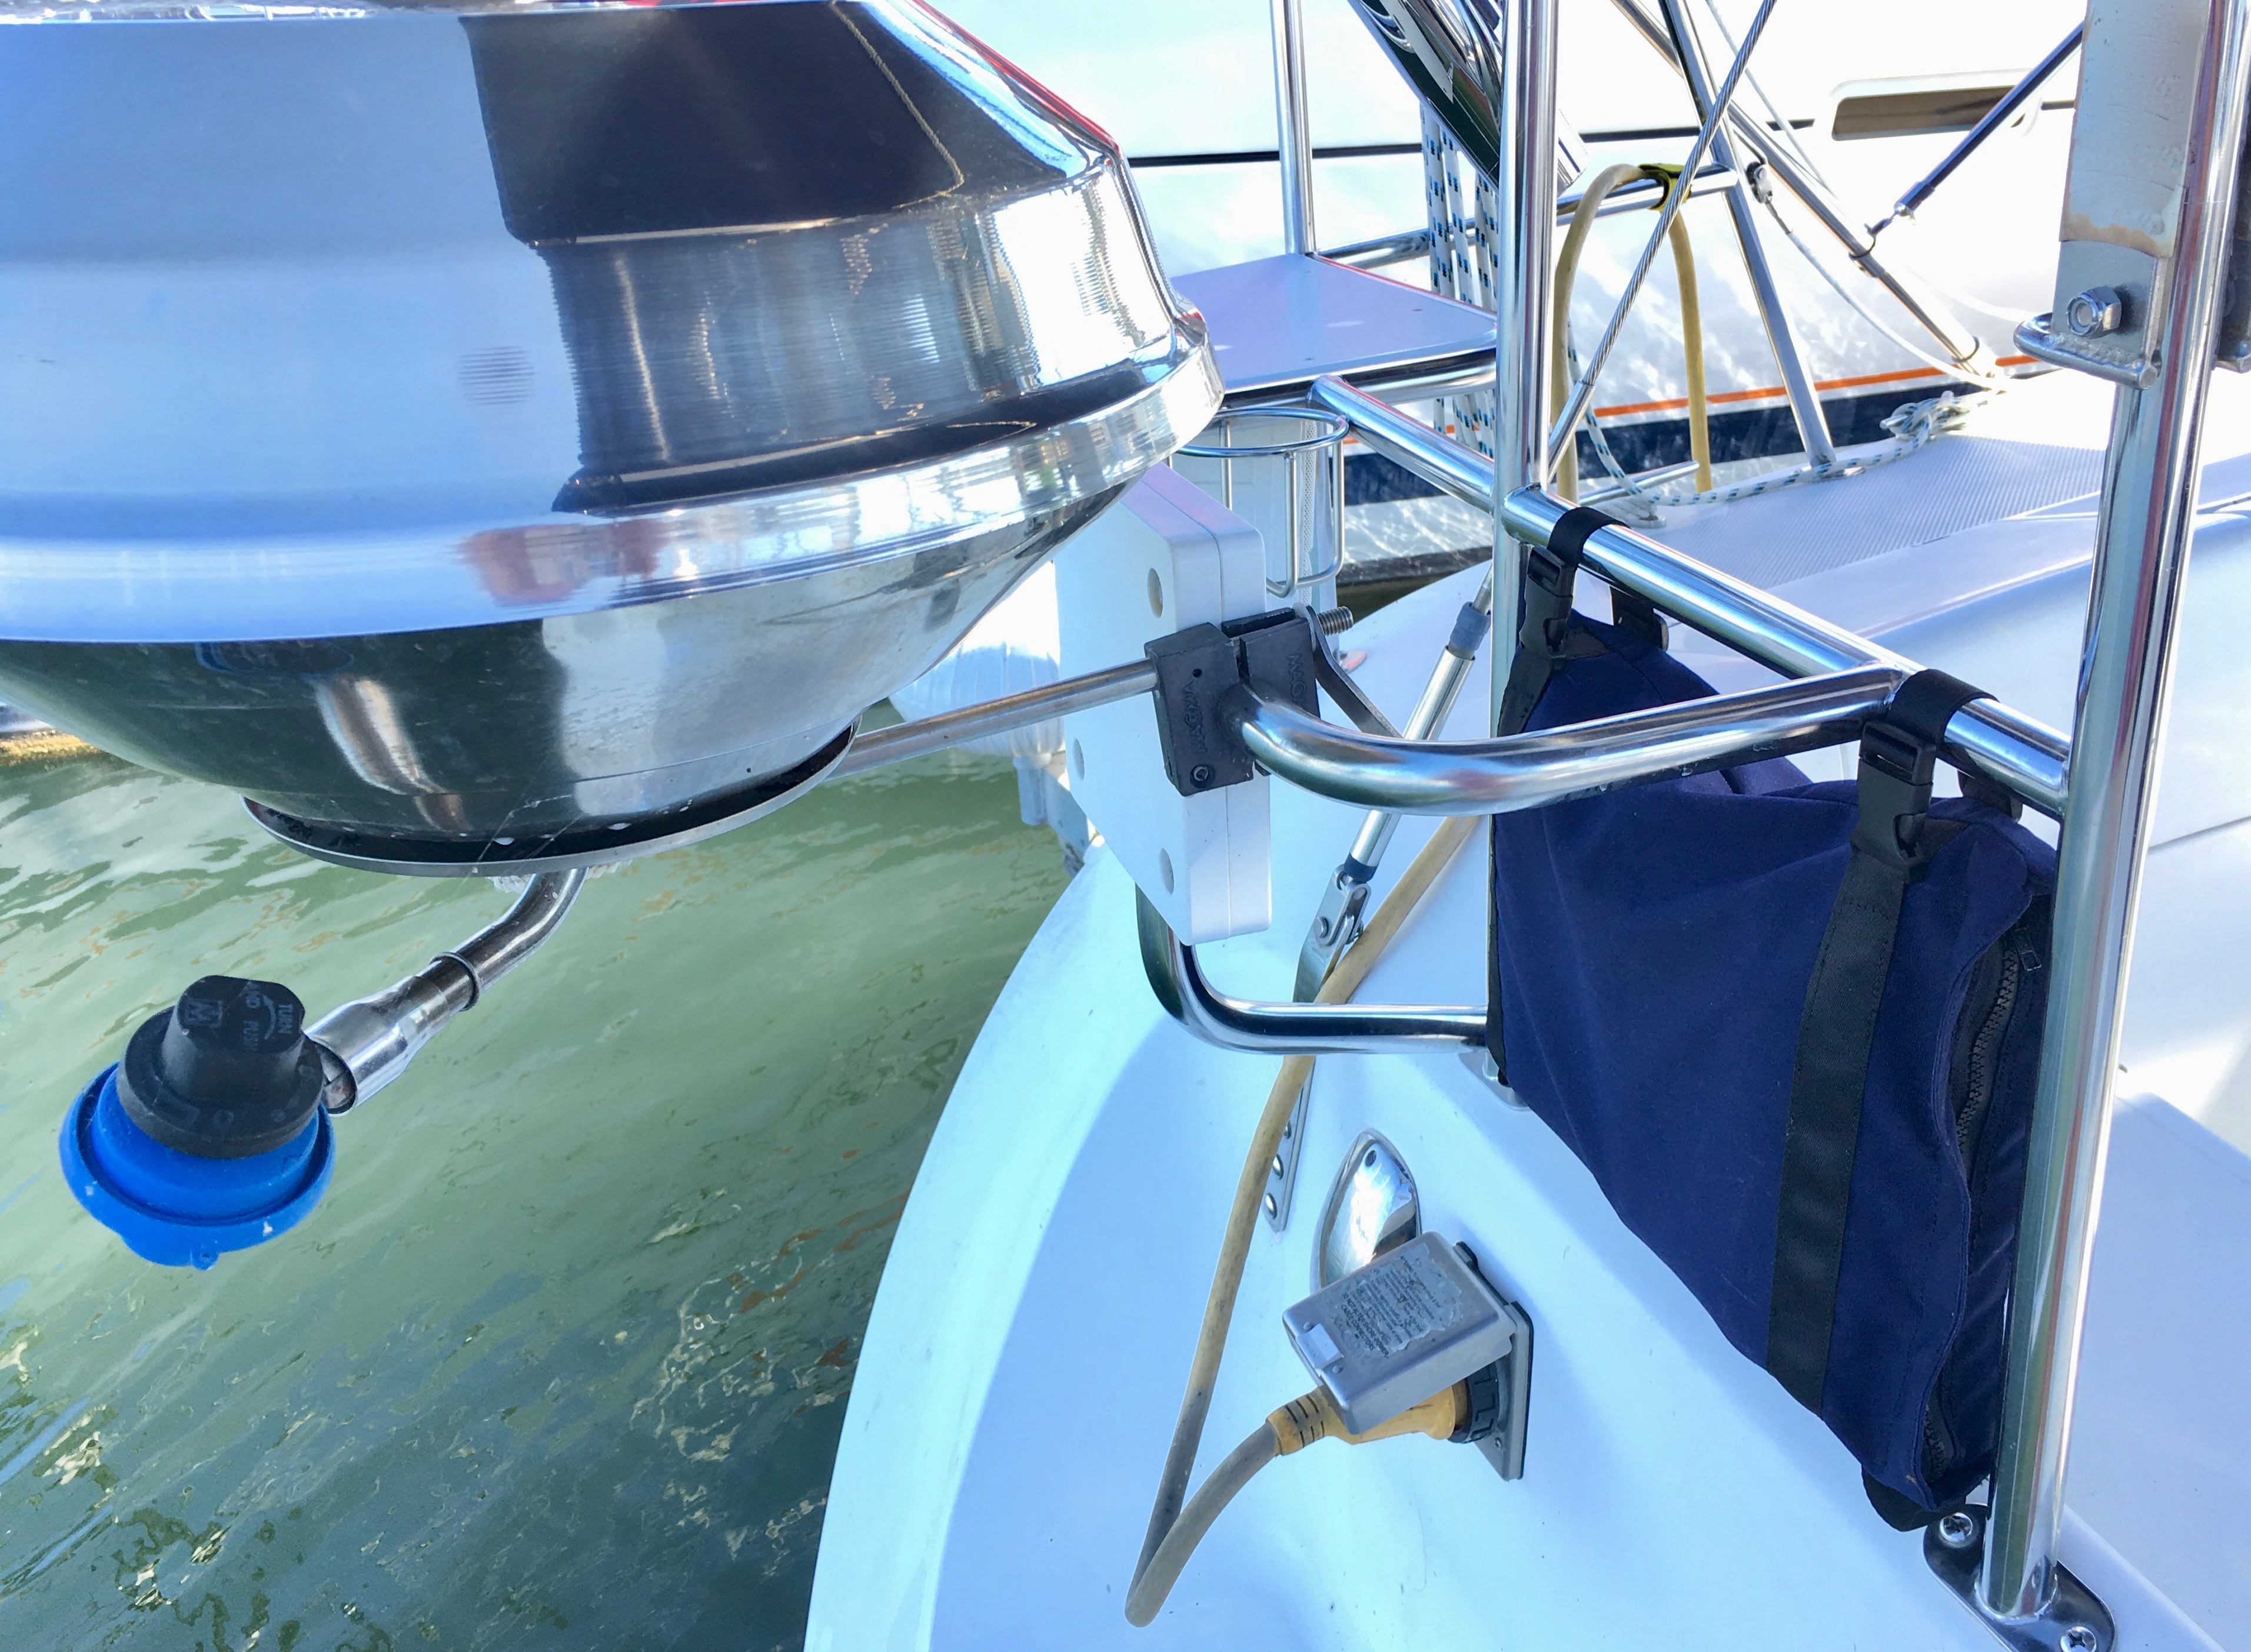
The grill on our boat uses propane, the kind in the little 1 lb green Coleman canisters.   We have been stowing them in one of our cockpit lazarettes.  However, that compartment is not made to hold and properly vent propane gas, which sinks.  That means if a canister were to leak, the gas would collect in the lowest point of the boat; the bilge, waiting for an errant spark to ignite it.   Not good.

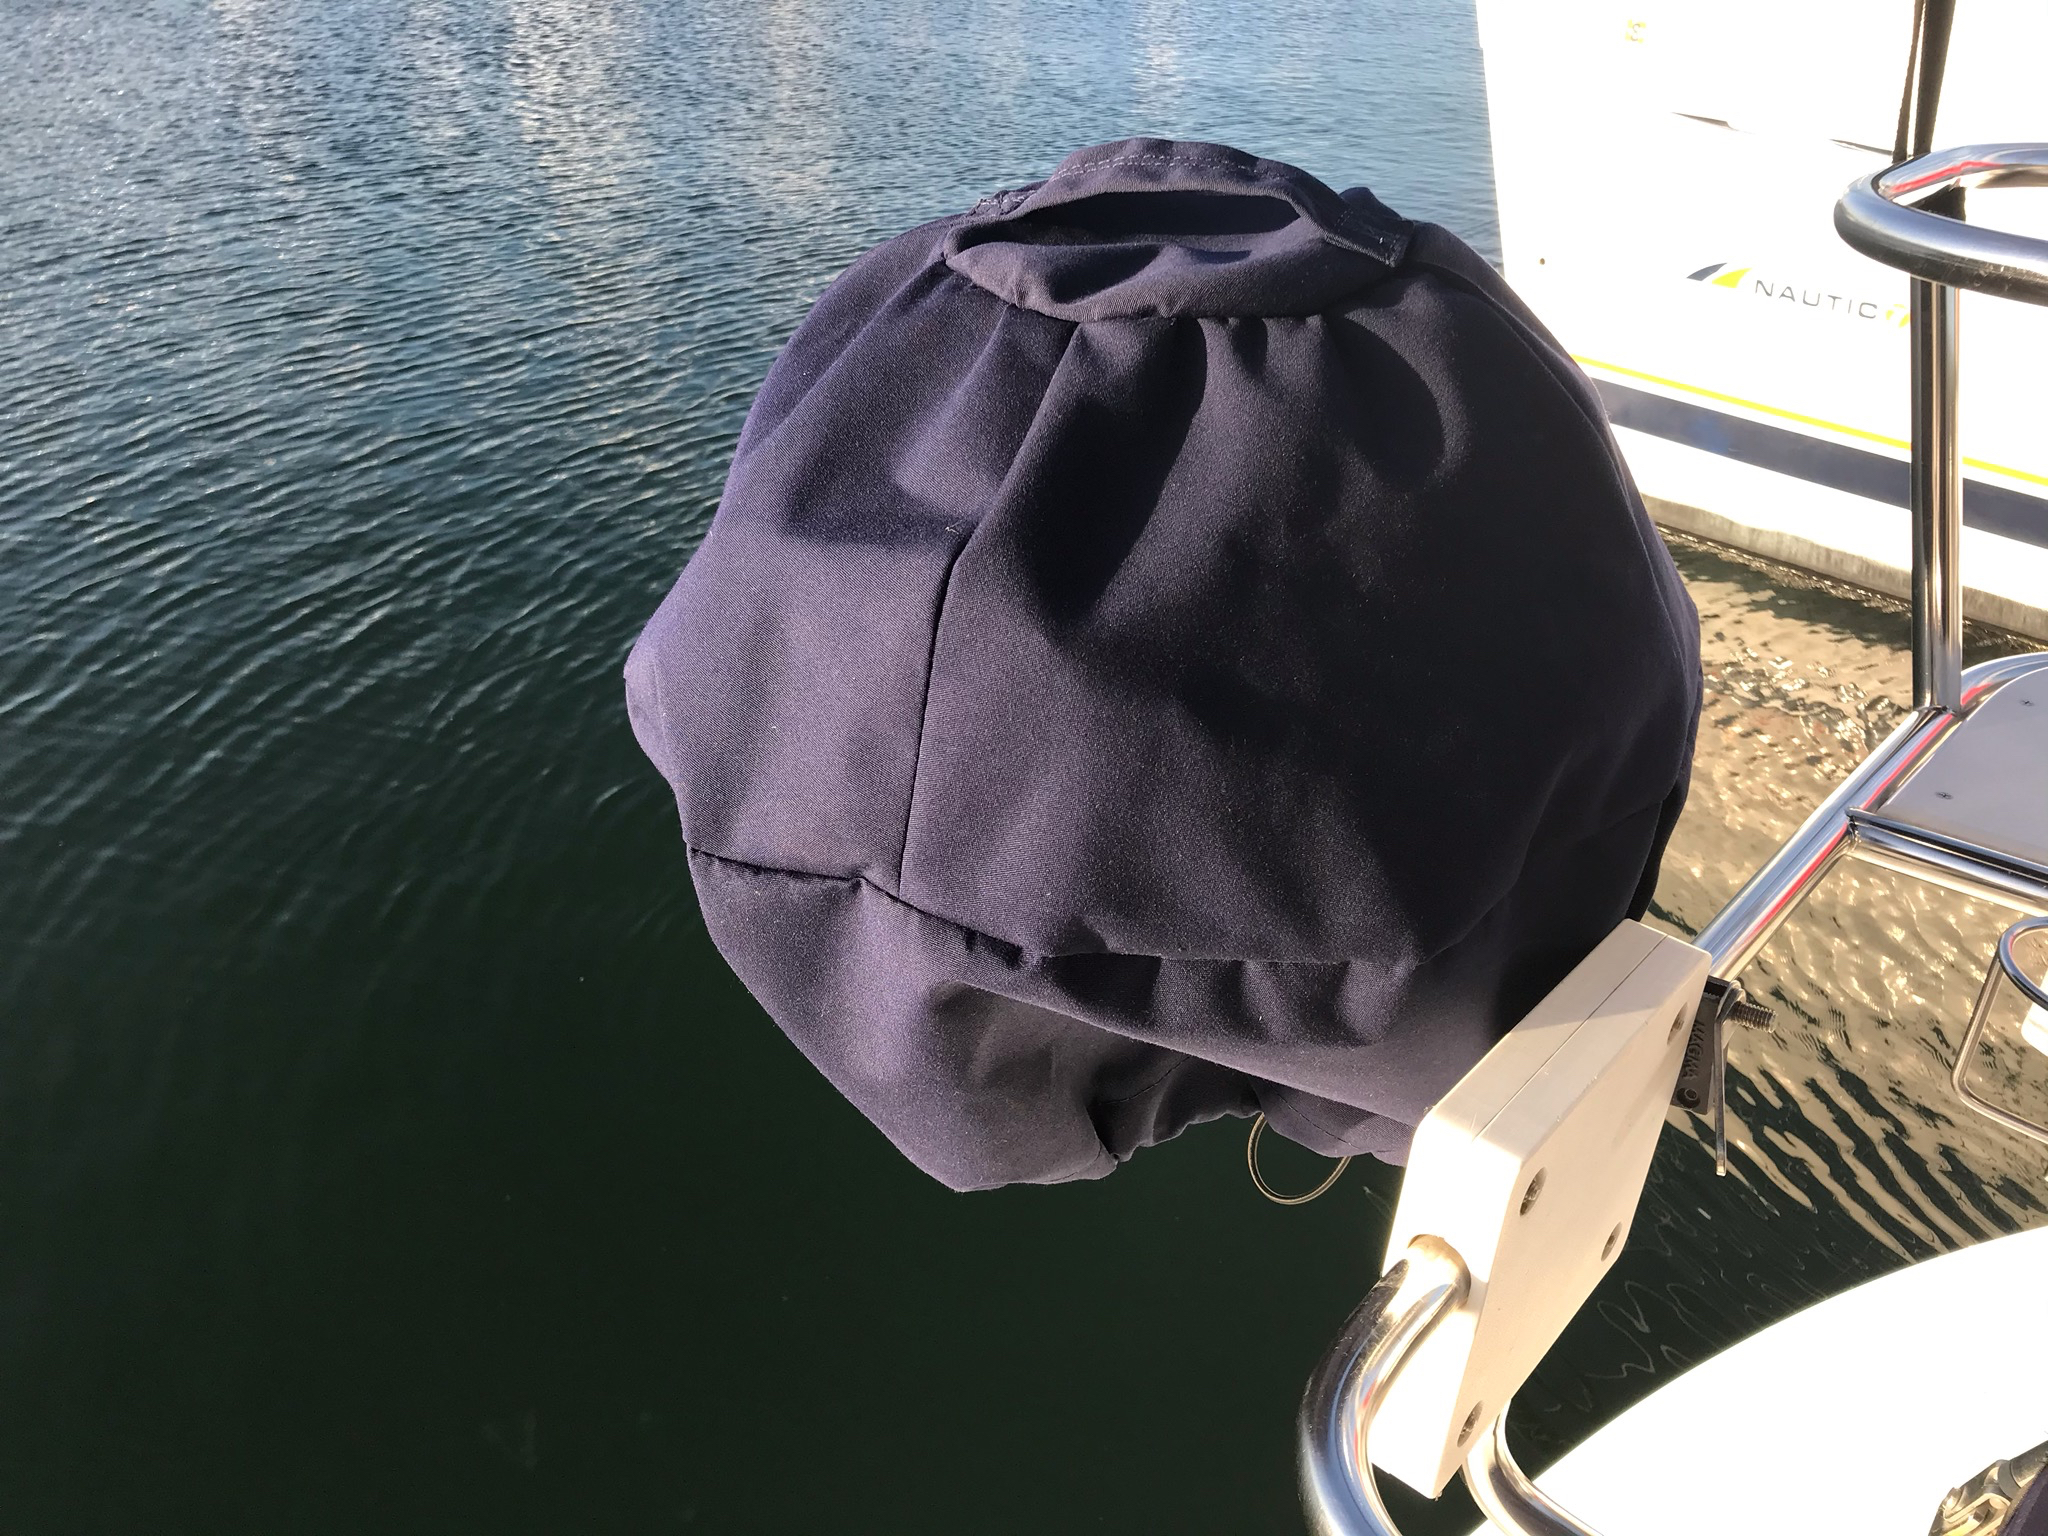
You can purchase a storage bag to hang on the rail of a boat to hold a few propane canisters, allowing any leaked gas to dissipate in the air over the water.  Magma (a marine grill vendor) sells one for under $35 which holds 3 canisters.  But it only comes in black and royal blue.  Nirvana’s canvas is navy blue (Sunbrella marine canvas in the color called Captain Navy).   For that reason, and also because I’ve really been wanting to try to sew something made out of sunbrella with my 20+ year old Kenmore 385 sewing machine, I decided to make it instead of buying one.

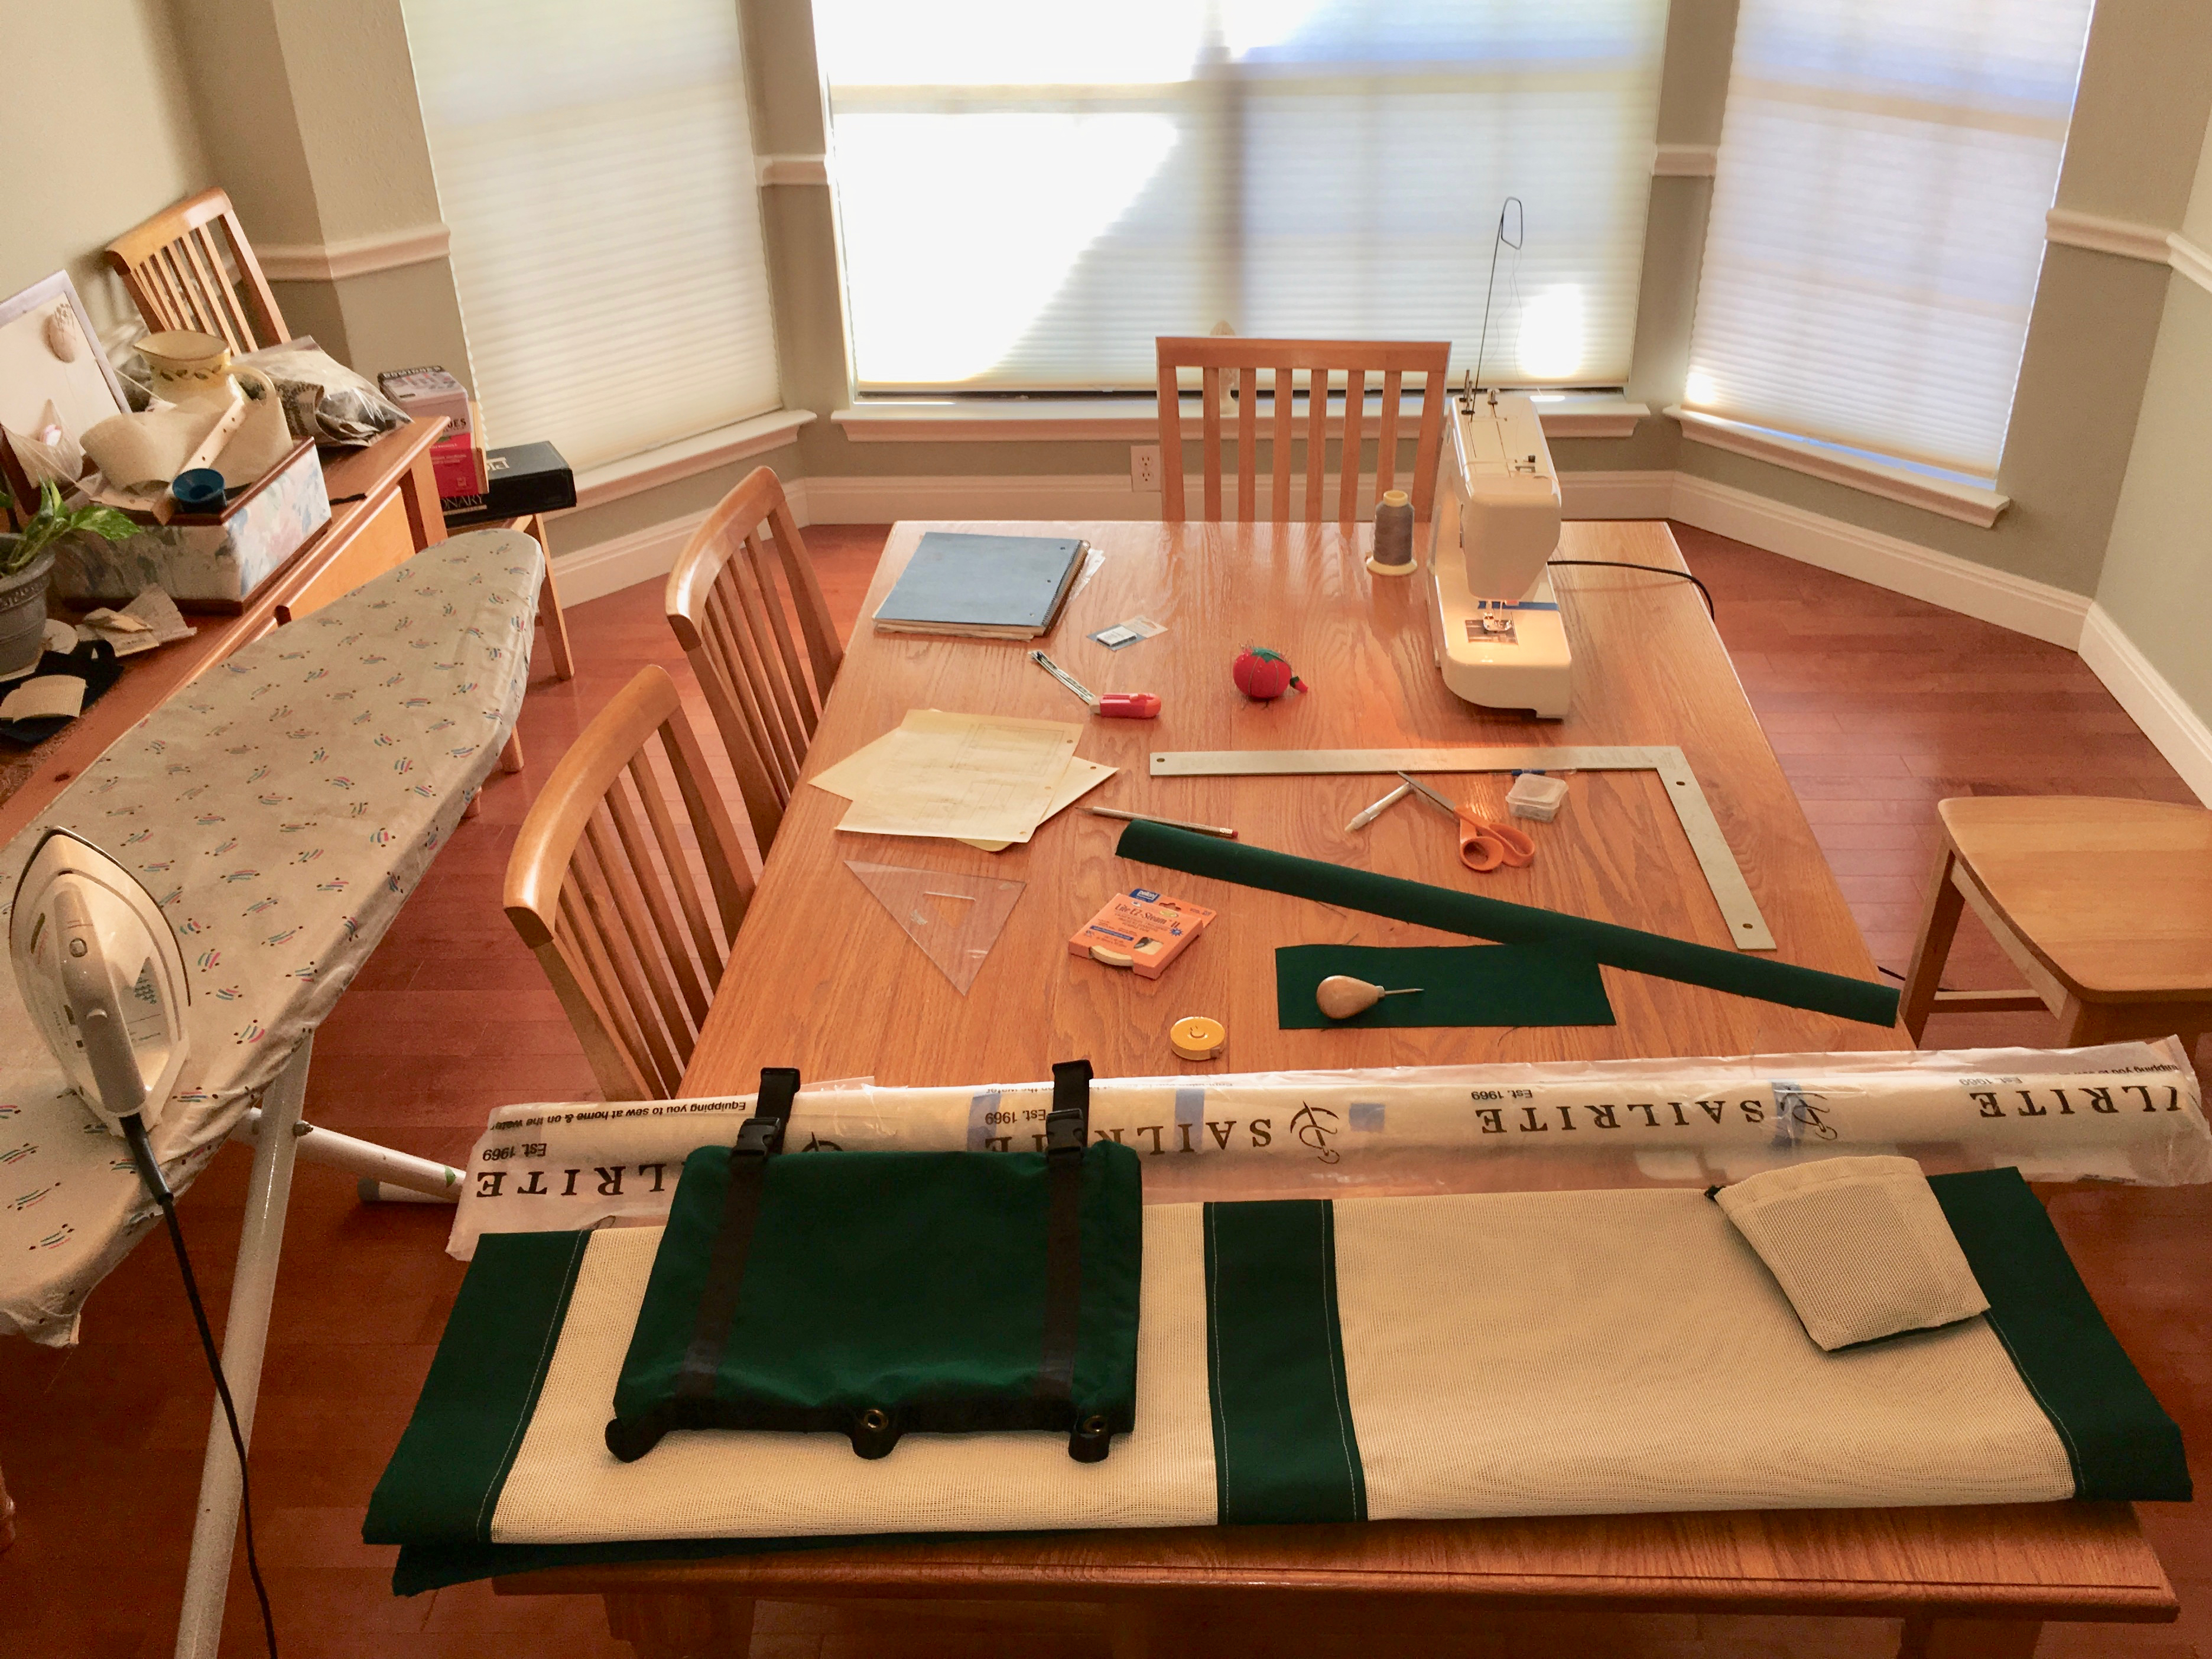
Lori happened to have an old bag in need of repair that I could use as a pattern, which was really helpful.   I ordered a yard of 60″ wide Sunbrella from Amazon, several 110/18 sized sewing machine needles, some size 69 bonded UV-resistant polyester thread, a heavy duty zipper, and some nylon webbing and plastic buckles.

The prototype:

IMG_6019

You can’t see them in the above picture, but there is a brass grommet and hole in the middle of the bottom of the bag, under that loop in the strip of webbing that runs along the bottom.  It is intended to allow water out of the bag when it’s hanging, if it rains.   The loop, I assume, is to tie a downhaul to the bag when it is hanging, so that it doesn’t swing back and forth while you are underway.  I decided to make my bag with 3 loops, and 3 grommeted drain holes, one under each loop.

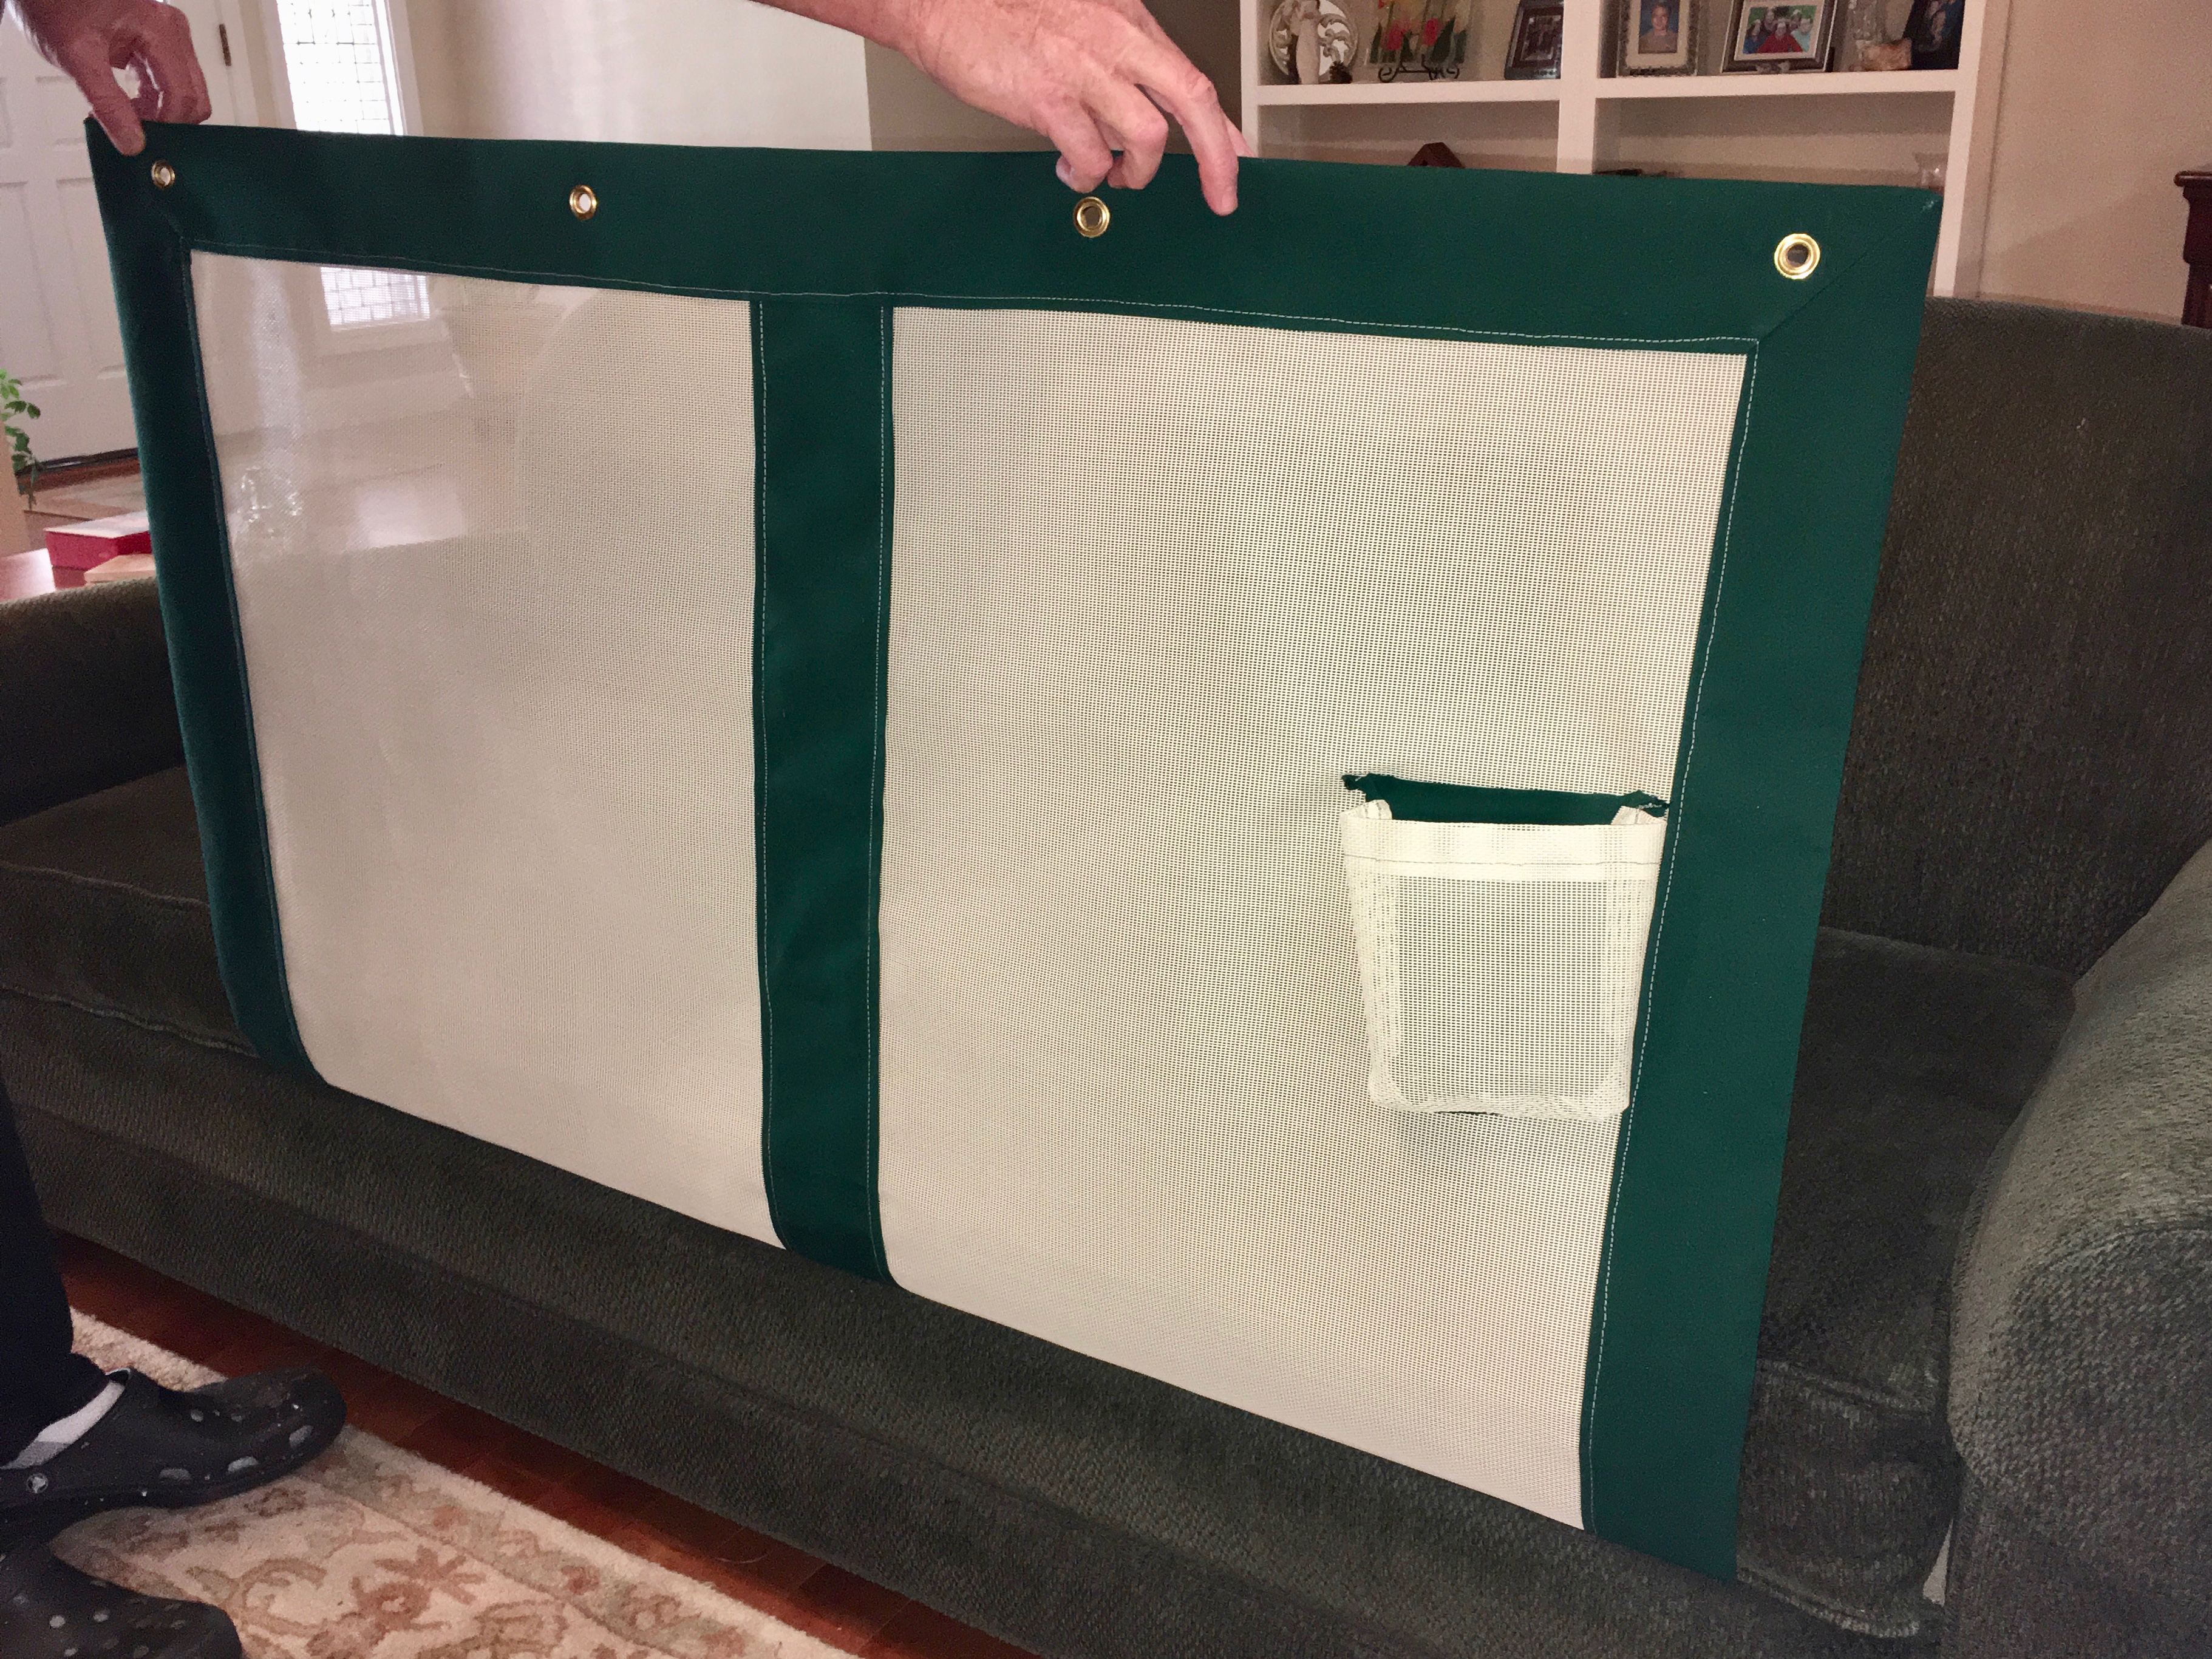
The pattern I made, and some notions.IMG_6027

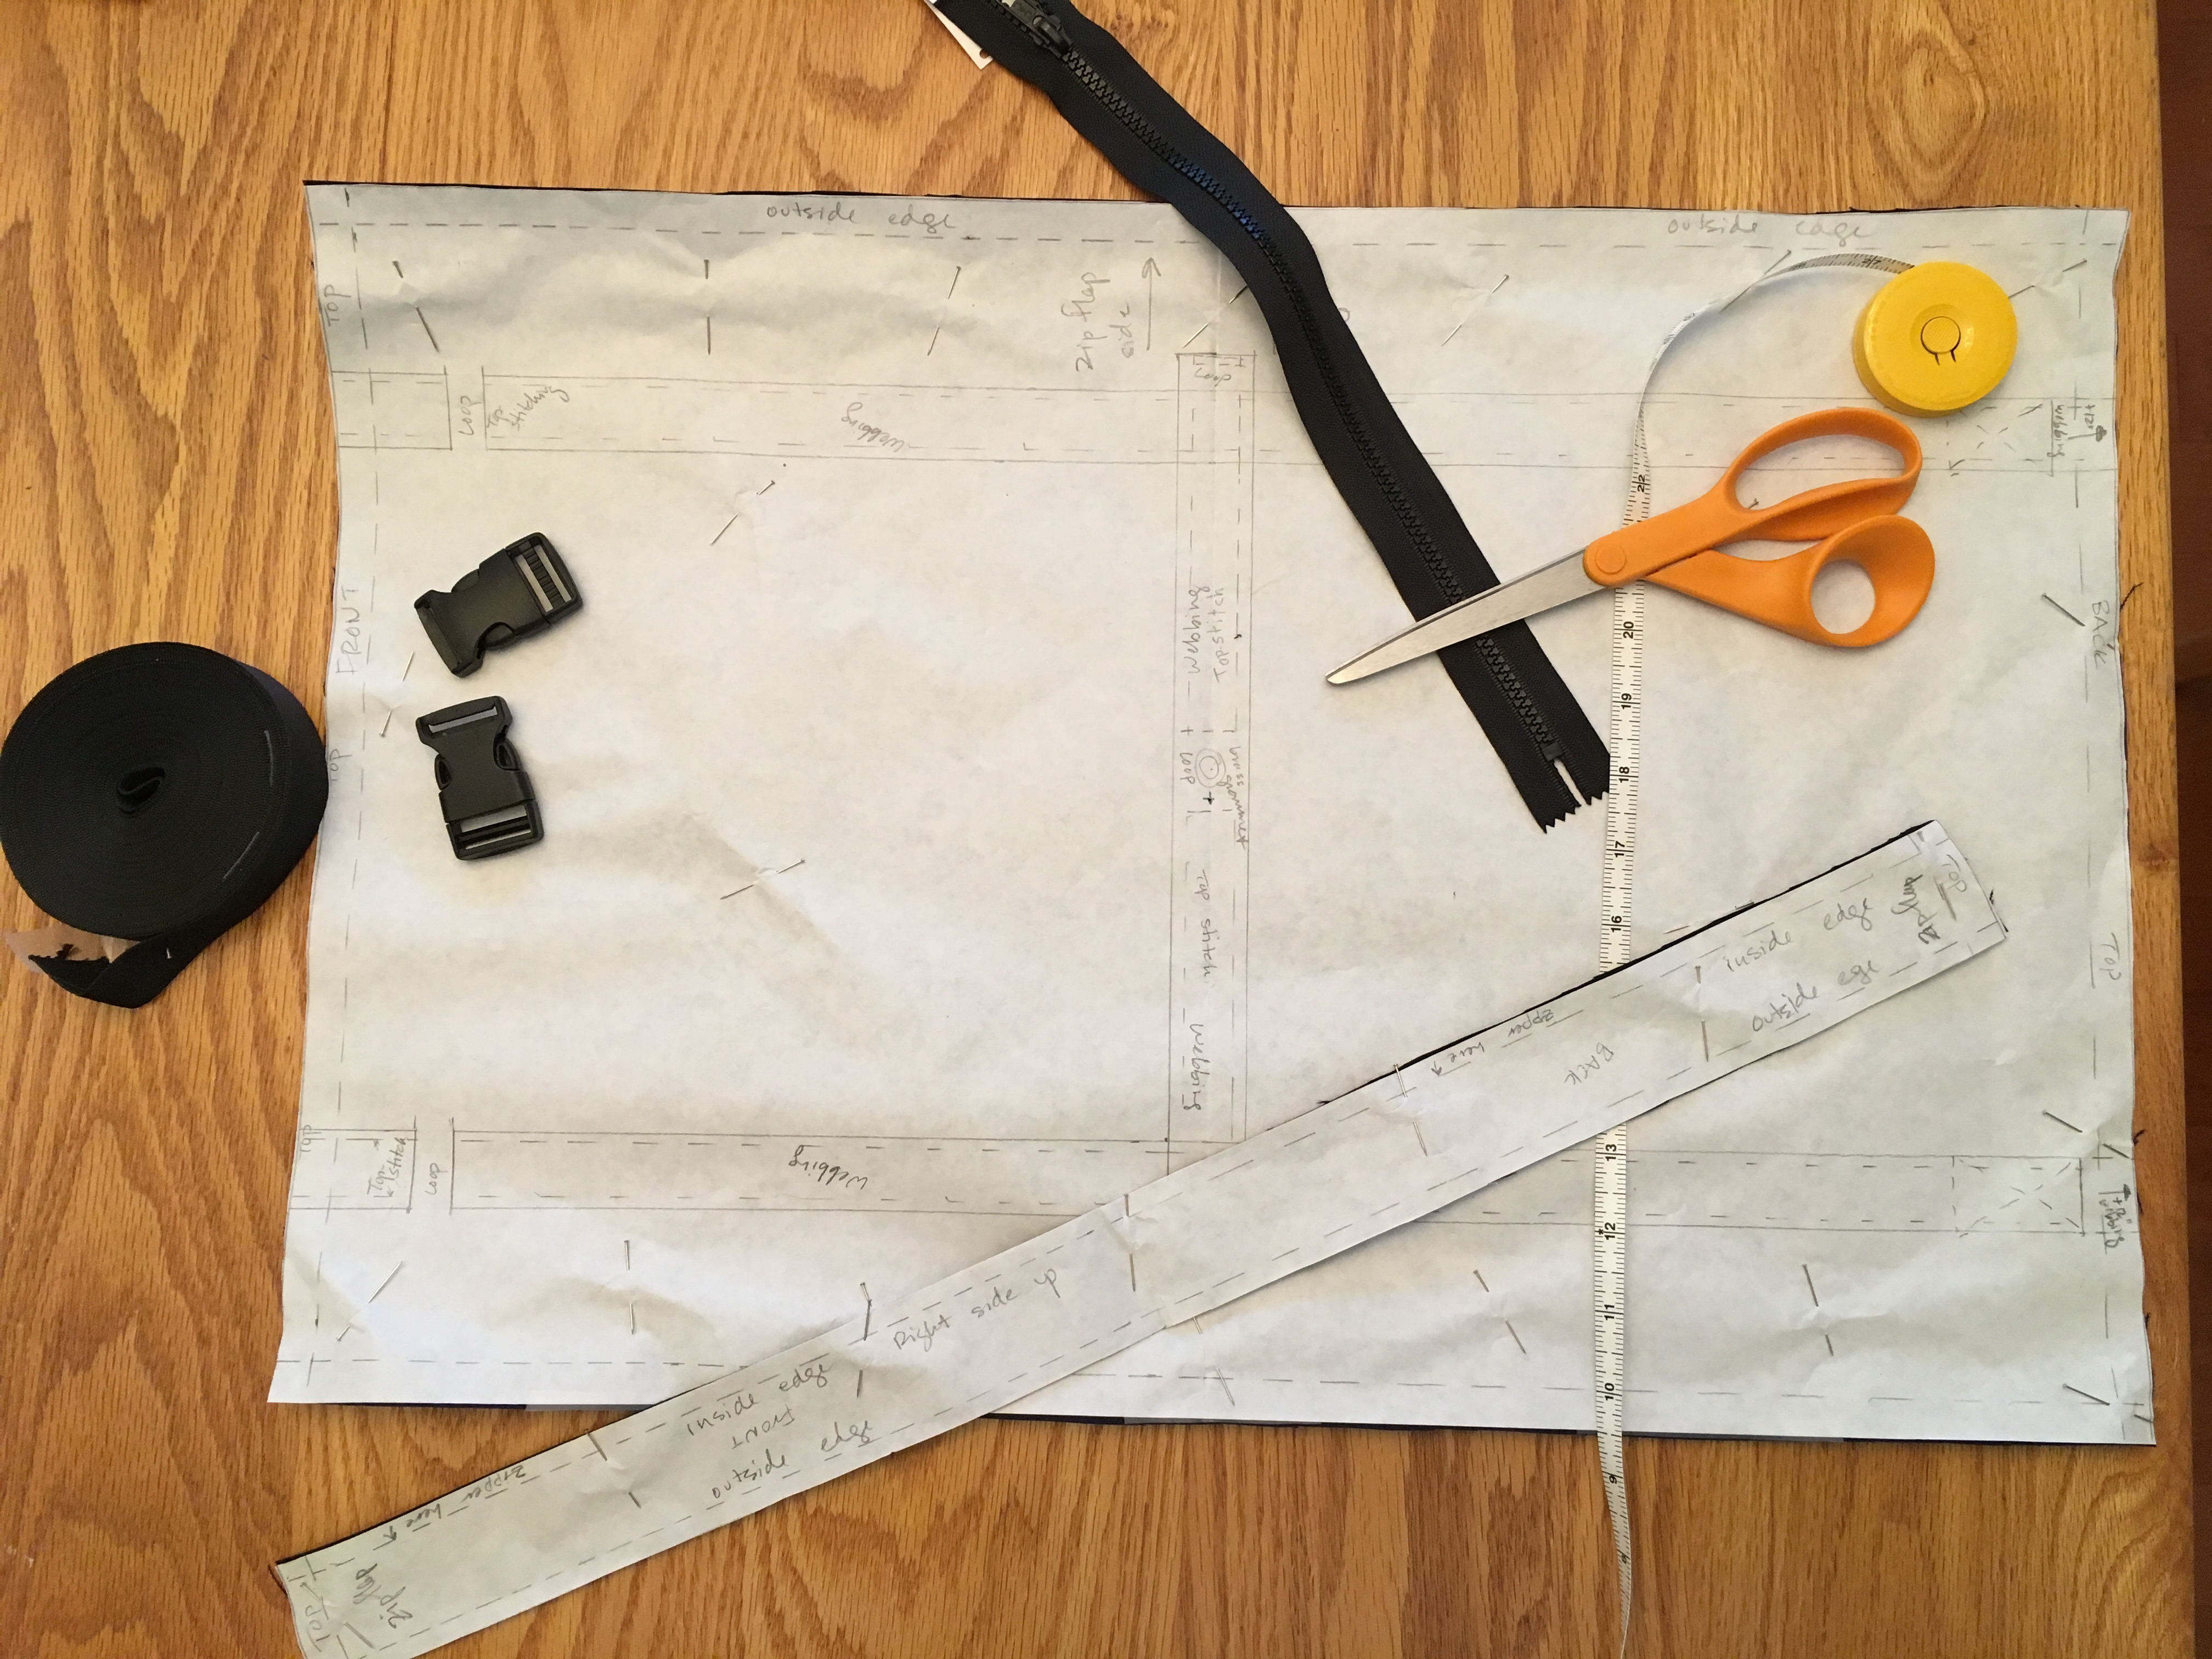
The first step was to install the brass grommets (which you can’t see in this pic either, but they are under the black webbing running down the middle of the canvas in the picture below).  Next step: pin and topstitch the webbing onto the outside of the bag, allowing for loops and buckles to be sewn in as you go.

IMG_6040

The next step was to sew the zipper on, and then sew the other two seams.  And VOILA!IMG_6043

View of side zipper.IMG_6044

I’m so thrilled that it turned out, AND that my current sewing machine was able to do the job.  I will definitely plan a few more boat canvas projects.

*smiling a satisfied smile*  🙂

%d bloggers like this: