
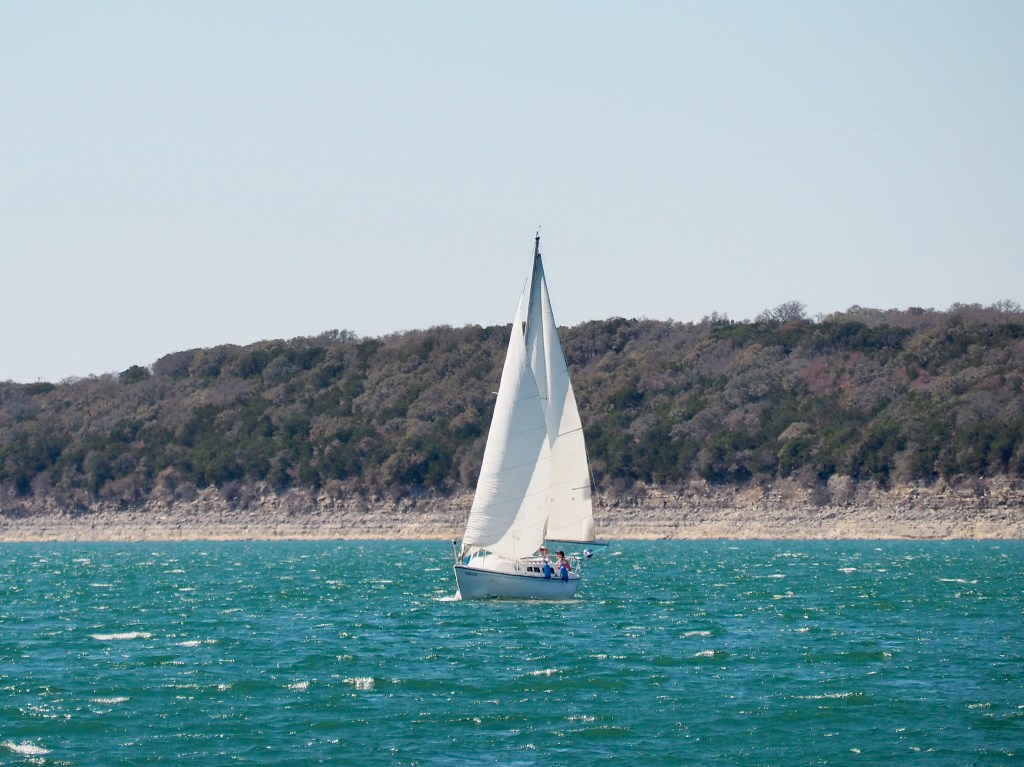
We took Nirvana out for a sail in Sunday’s beercan. We didn’t win the race, but I won the latest battle in mending the jib. My latest repair held nicely in 20+ knot winds. 👍🏼

We took Nirvana out for a sail in Sunday’s beercan. We didn’t win the race, but I won the latest battle in mending the jib. My latest repair held nicely in 20+ knot winds. 👍🏼
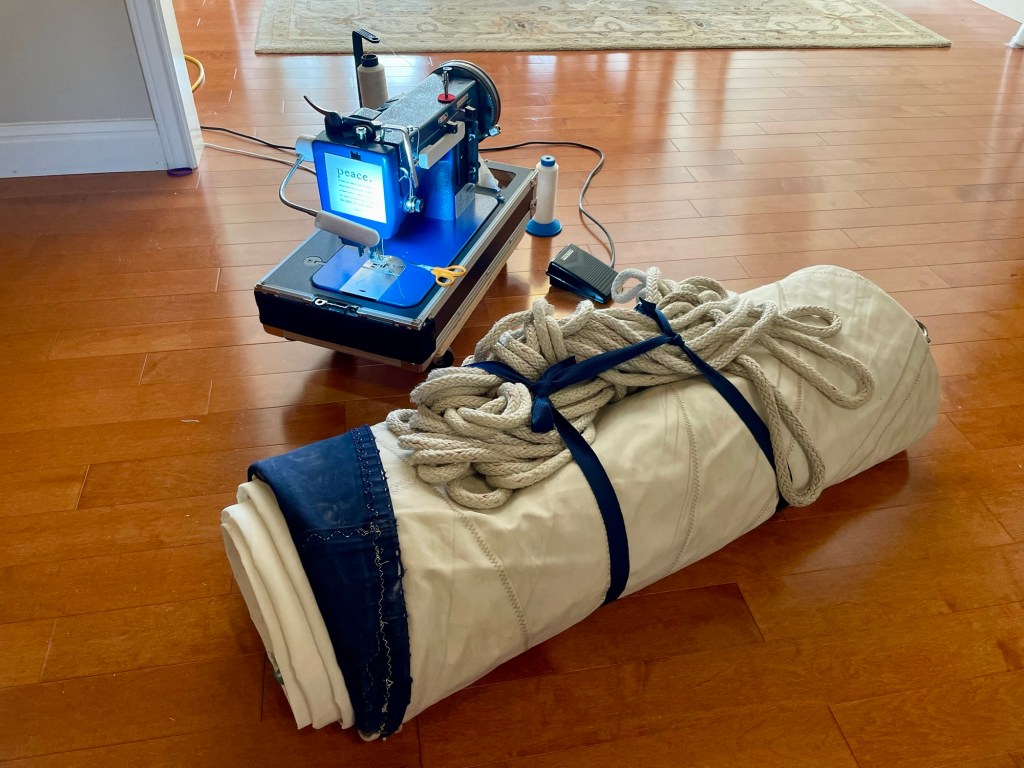
I finally got a couple of days to work on our jib. The sailcloth is in good shape for the most part. Except for the section along the leech that gets beat against the shrouds every tack, and pressed tight against the spreaders when close hauled. It has torn in several places.
After a discussion with the sailmaker at Sailrite I decided to go for a repair that replaced the first 30” or so on the leech end of 3 panels of the sail. Also patched the beat up sunbrella sun cover and made new spreader patches. And replaced a few well worn webbing strips at the head and clew as well.

It took me about 2 full days of my slow but steady mode of work. Also using PTFE thread in my LSZ-1 is a huge pain in the aft, but it’s a necessity for the UV-exposed stitching.

But it’s done and I like how it came out. And I have my living room back. Fingers crossed that it does the trick 🤞🏼
While I was doing this project, Monte was rebuilding and installing our autopilot wheel drive unit. ✅ and ✅
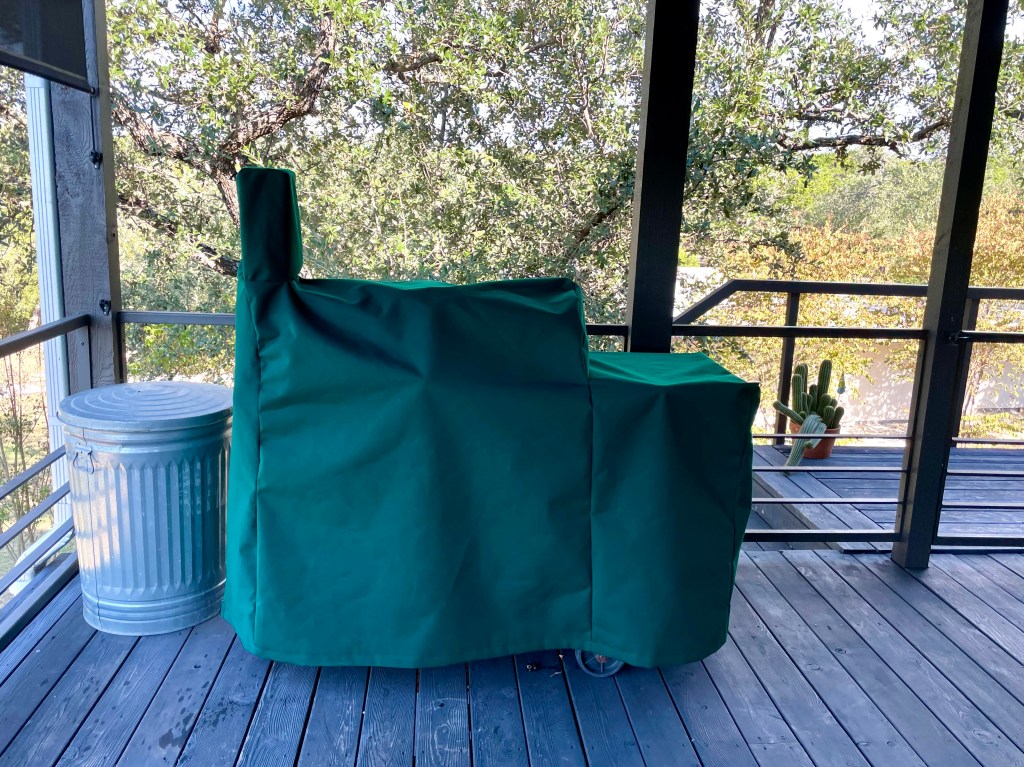
I just finished a cover for a smoker/grill for someone who lives out near Marble Falls. It was quite the puzzle requiring some mental gymnastics to get from taking measurements, to making a pattern, to assembly. It turned out great, I think.
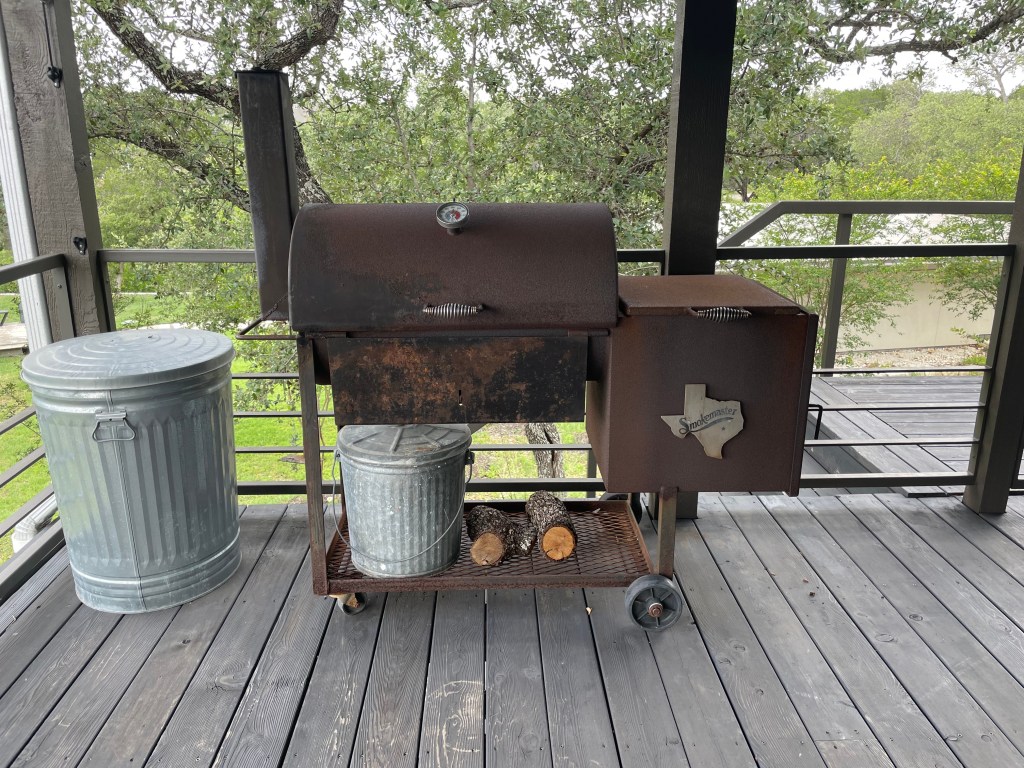

I had to visit the grill several times. It’s a 45-minute drive from my house, which takes me right past Balcones Canyonlands National Wildlife Refuge. So I popped in a couple of times to take in the view.


✅ That item is crossed off the list. Now, on to mending our jib (again).
As Monte likes to say, every time we go to the boat to cross something off the todo list, we add 2 more things to the list.
On Monday we went to the marina to install 3 new halyards and new jib sheets on Nirvana. When we lowered the jib to change the halyard, I found a 2’ long tear along the edge of the sunbrella cover. So we rolled it up and brought it home.
No more over-sheeting the jib against the spreaders, please. It’s not the America’s Cup…


Yesterday I laid it out and mended it; should be good for a while. I ripped off the sunbrella cover, sandwiched the tear between 2 layers of new adhesive-backed 6 oz dacron, sewed it down several times, and then sewed the sunbrella back down.
One step forward…
Last year one of the catboat’s trailer tires wore out, due mostly to UV damage, and sitting on the dirt. It now has a new set of radials, for which Monte requested covers.
Today I got around to making them, out of captain navy sunbrella. Voila! The squirrels better not mess with these!

Project #2 was a new grill cover for S/V Trident’s Magma grill out of forest green sunbrella reclaimed from one of Lori’s old dodger window cover panels.

Now I guess I have no more excuses to keep me from finishing my taxes…
After four months of work, Julie and Ryan’s sailboat is ready to be enjoyed. This week we sailed alongside them, and then rafted up together. It was their first time taking Arya out in high winds (gusting 25 to 30 knots!) and they did great.
It was also their first raft-up, and they christened their new grill. A good time on the water. Can’t wait for Spring!

🙂
My latest build request to Monte was a thread-spool rack for my work closet. My projects continue to expand, and my thread inventory has become an unmanageable pile of spools. I also want to be able to store each bobbin with its corresponding spool of thread, since it’s hard to tell the difference between V-69 and V-92 thread sizes; and navy blue, black and dark green start to look the same to my old eyes. So, the top of each dowel is tapered so bobbins can be stored with each spool. I can also use it to store my growing collection of binding tape, basting tape, cord, and webbing. Voila!

It’s perfect.
Today was the day to re-raise the mast on Julie & Ryan’s boat. New windex, new lights, new halyards, new topping lift, new flag halyard, new sheaves, new wiring, new switches, refurbished outboard motor, replaced bulkhead mid-ships in the salon, chain plates reinforced, and some much-mended sails and boat canvas. I can’t wait to get out on the lake with these sailors. Next up: installing the boom, mainsail, and jib. Then we’ll take her for a sail!

🙂
I have entered the “bag” phase of my maker existence. I decided to try to make a bag styled like the classic LL Bean Boat and Tote. We were gifted a pair of them as a wedding gift, and have been using them hard and constantly for almost 2 decades. And they still have much life left in them.
The LL Bean totes are made with 24 oz cotton duck. I already had some 15 oz, so I used that for my first bag prototype. I also used some 8.8 oz navy cotton duck for the bottom and straps. Duck cloth is supposed to shrink anywhere from 5-10%. So, I’ll have to see how my design holds up over time.


The finished dimensions of this bag are 17″ W x 14.5″ H x 7″ D, which is pretty close to the Large-sized LL Bean Boat and Tote. The ones we already own are the Medium and X-Large sizes, so this will be a nice addition.
If you’re interested in trying to make one yourself, here are my notes:

I used V-92 polyester thread, and a #18 needle. My Sailrite LSZ-1 cuts through all those layers like butter.
I may try making one with Sunbrella material for the bottom and handles, instead of the 8.8 oz duck cloth, as I see that marine Sunbrella is 9 oz, so fairly close. Though Sunbrella is much more pricey than duckcloth…
Next challenge: making bags out of a used mainsail that friends gifted me. Stay tuned.
I have been keeping my year-old Sailrite sewing machine busy with boat canvas and sail projects, to make way for the next ones on my list.

Finished projects:
Next projects:
Bring it on!
Julie and Ryan recently acquired a new-to-them sailboat. It’s an older Catalina 25. It needs some work, so we are helping them get things fixed up. Clever Monte got the outboard motor working. Now he is helping Ryan repair the electrics on-board. Julie brought over the sails, which need some mending. Their mainsail will be my next sail project. It’s in pretty good shape, except where sun damage caused some tears and deterioration where the previous owner left parts of the sail exposed.

I knocked out a quick project today as rain soaked the yard. It’s a bag to hold a 3L boxed-wine bladder. Boats don’t much like things made out of cardboard; roaches do. So we don’t bring cardboard on-board. This bag will hold, hang, and dispense the wine instead, so we can toss the box for recycling. Yes, that’s right, I just ooze class. 🙂

I just finished a new canopy cover for my friend, Irene’s, garden swing. I popped over this morning and we put it on. Looks great!

Okay, I’m a tiny bit ecstatic. I finished the mainsail repairs today. And the slow, endless rain of the last week or so has moved on. So we drove out to the marina and tied the main back on, then took Nirvana out for a sail for the first time in about 3 months. We hoisted both the main and the jib. It was the first time taking Nirvana out since I repaired each of the sails. The winds were light, but I loved seeing them out and in the wind.


