
I just finished a new canopy cover for my friend, Irene’s, garden swing. I popped over this morning and we put it on. Looks great!
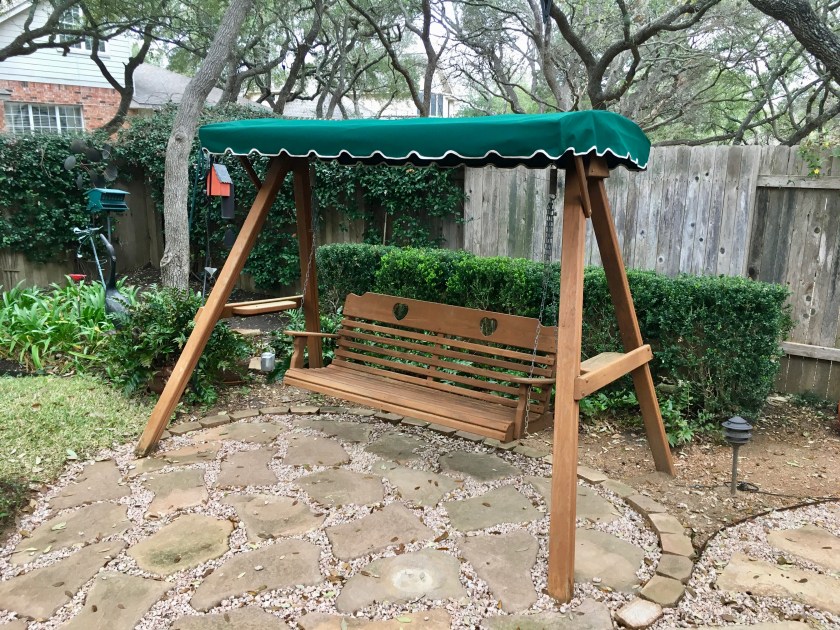
I just finished a new canopy cover for my friend, Irene’s, garden swing. I popped over this morning and we put it on. Looks great!
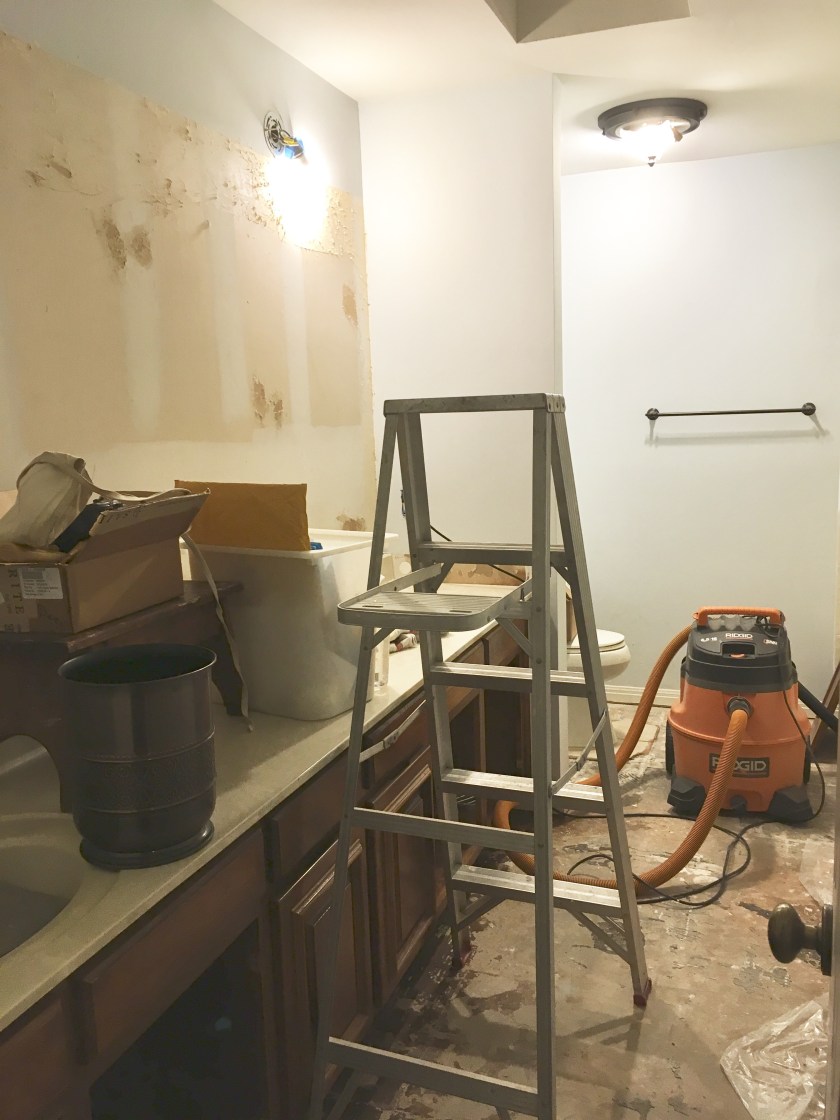
Time has flown by since we took Nirvana’s mainsail home at the beginning of December. But we’ve not been idle. We’ve had a lot going on; a few visits from family and friends, an Atlantic coast boat delivery, the holidays, the bathroom remodel, yardwork, life, etc. But I think I’m almost ready to start repairing the main.
I’ve made a scale drawing of the sail and all its detail (including seams, layers of dacron, batten pockets, luff and leech tape, direction of the warp & weft/fill – or weave – of each piece of the sail’s construction, etc). On top of that, I marked the location of the damaged areas that need to be repaired. Using this, I can figure out a strategy of what pieces to replace, the dimension of each piece, and then lay them out on scale drawings of 54″ wide dacron yardage so I can figure out how much I need to cut out all the pieces with the weave in the required direction.
Nirvana’s sail is a bit unusual – at least for a US boat – in that it has a furling boom (a Forespar LeisureFurl furling boom). It’s a very nice upgrade that is reportedly prevalent in Australia and New Zealand sailboats. We like the convenience and the fact that our furling boom allows us to have full battens in our main. As I’m preparing to repair the mainsail, I’ve learned that sails for LeisureFurl booms are built with multiple layers, or plies, toward the leech end of the sail, which is required to ensure proper furling of the main. It just makes things a bit more interesting (complicated), as that is where the majority of the damage is. I’ve also spent time on the phone with Sailrite and Forespar to ensure I use the right weight of dacron for the replacement pieces.
The repairs I plan to make to the mainsail include:
– Replacing the bolt rope tape on the luff of the sail. This goes into a track on the aft-side of the mainmast as the sail is raised and lowered. It is well worn due to wear and UV damage.

– Replacing the dacron tape along the leech of the sail. This is well worn and cracking due to wear and UV damage.

– Replacing areas of varying widths along the entire leech of the sail where UV damage has degraded much of the top ply of dacron. The previous owner neglected to replace a worn sail cover before selling her, probably for a couple of years, resulting in a wide swath of cracked and torn dacron that remained exposed to the sun when the main was furled.
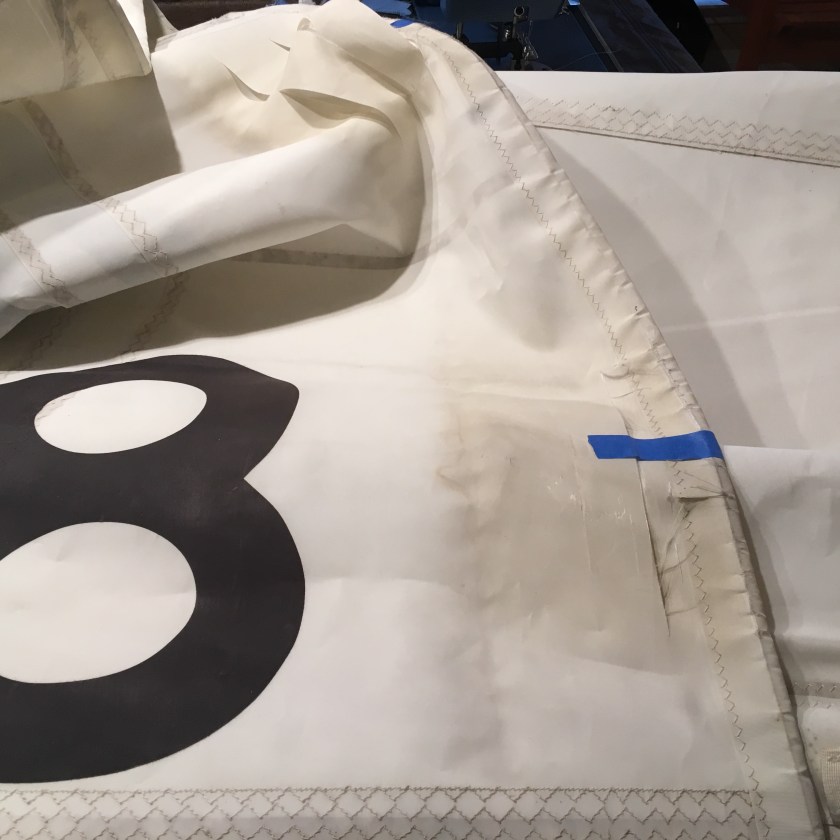
I’ve been taking my time, as sail work is new to me, and I have a lot to learn. The first 2 sets of repairs are straightforward. The third set of repairs is non-trivial and essentially requires replacement of much of the top 2 plies of the sail.
The picture below shows the drawing I’ve made of the port-side of Nirvana’s approximately 13 1/2′ x 38′ mainsail. The brown lines represent the batten pockets that are on top of all the layers of dacron and the luff & leech tape. I essentially need to remove and replace the pink and blue layers of dacron on the aft-end of the sail.

Because of the order in which the parts of the mainsail are sewn, I’ll have to pull up the existing batten pockets to remove the worn pieces of the sail, then sew in the new pieces of dacron, and then sew the batten pockets back down, before sewing the luff and leech tape on. I’ll also have to replace a couple of the numbers on the sail when all the repairs are done, as some of the sections that need replacement are under the sail numbers.
This is definitely more complicated than the repairs I made to the jib a few months back. But, I’m cautiously optimistic that I can do this. Stay tuned to see how it turns out.
The new Silestone (quartz) countertop and under-mount sinks were installed today. Then I installed the faucets. Looks good!
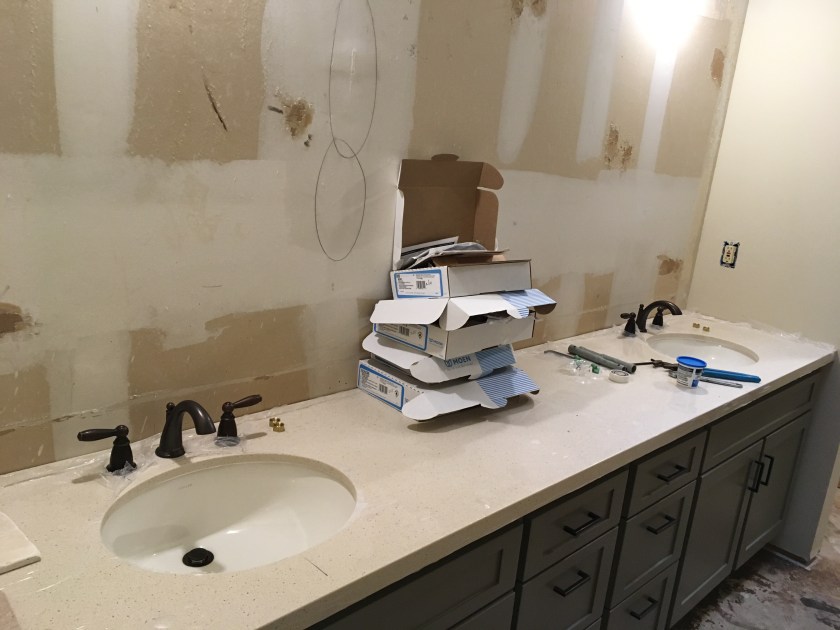
After this: floor tile, wall tile, and baseboards!
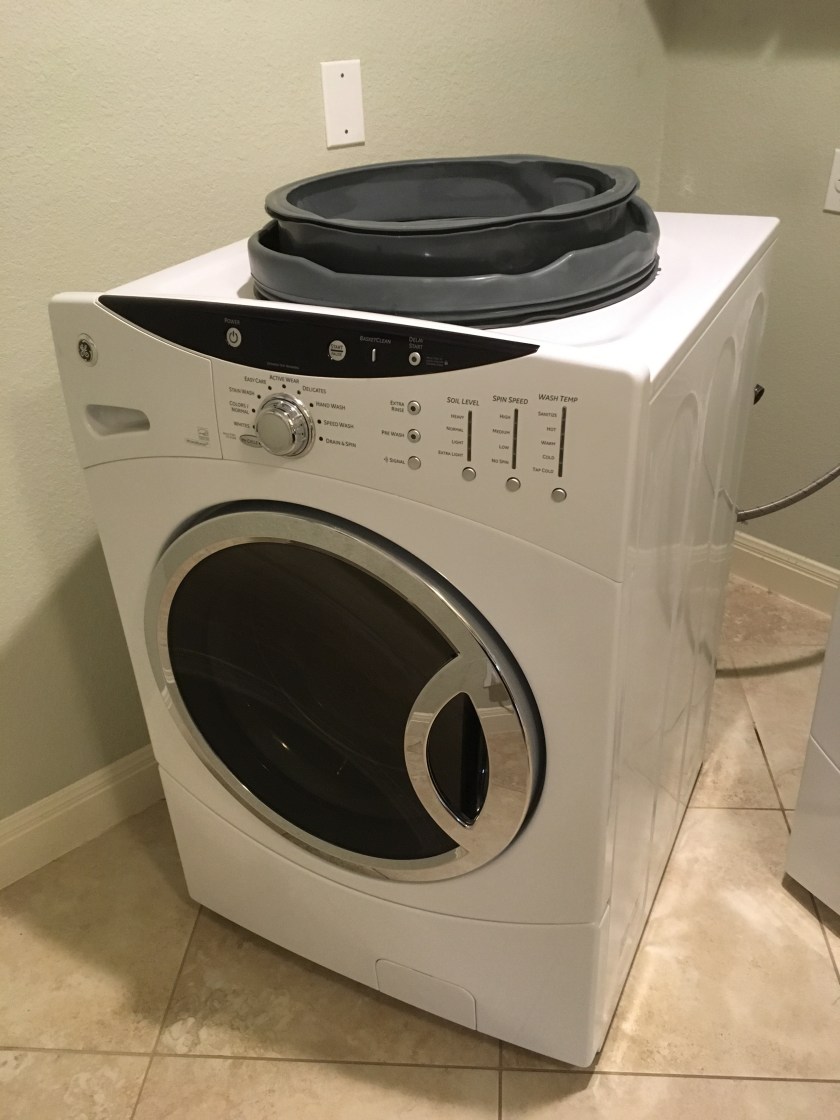
Several months ago, I noticed water leaking from our 10-year old GE front-load washing machine while doing a load of laundry. Upon inspection, I saw that a little piece of the rubber seal between the drum and the door had been torn away.
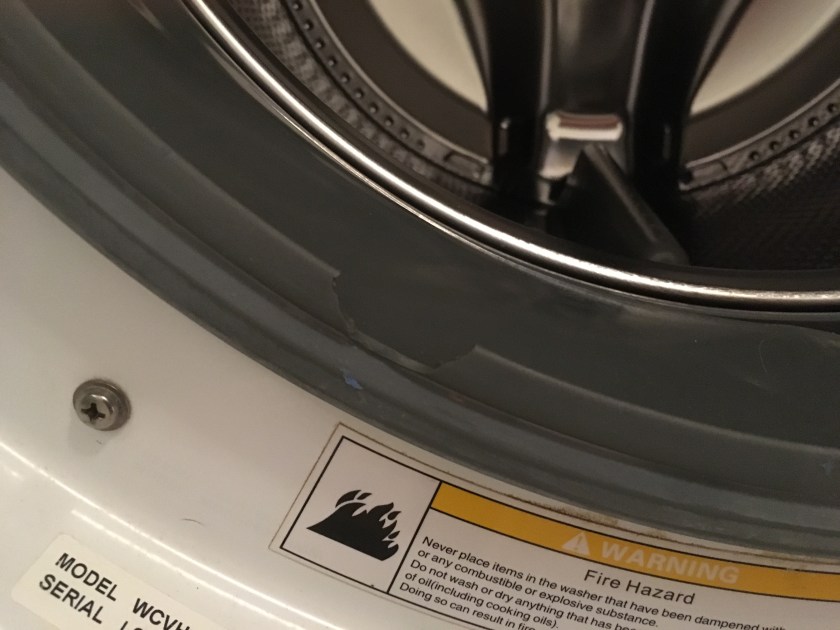
For a while, a temporary repair involving tape worked. But the leak returned and eventually got worse.
After a little internet research, I found and ordered a replacement part – a new rubber door gasket – and found a couple of videos walking through how to replace it step by step. I suggest watching more than one, as each one highlights slightly different things. These are the 2 videos I found. I decided to give it a shot.
The part came in last week, so today was the day to install it! The videos are only about 15 minutes long. My total elapsed repair time was around 3 hours, though, which included collecting the tools I needed, moving the washer out to where I could work on it, cleaning everything as I went, and playing/pausing both videos as I proceeded from one step to the next.
The patient, with new door gasket sitting on top of the machine:
While the videos say the repair is an easy one, it does require you to disassemble much of the machine, or at least more than I thought would fall into the “easy” category.
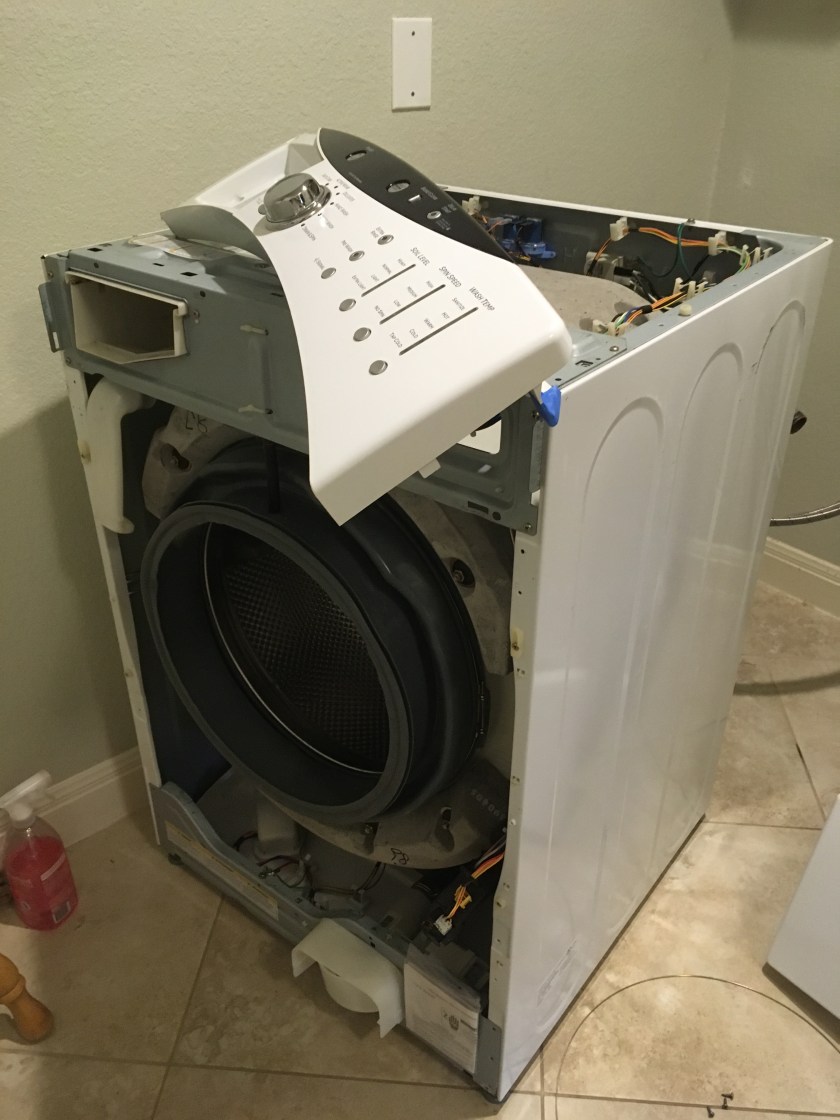
New door gasket part-way installed!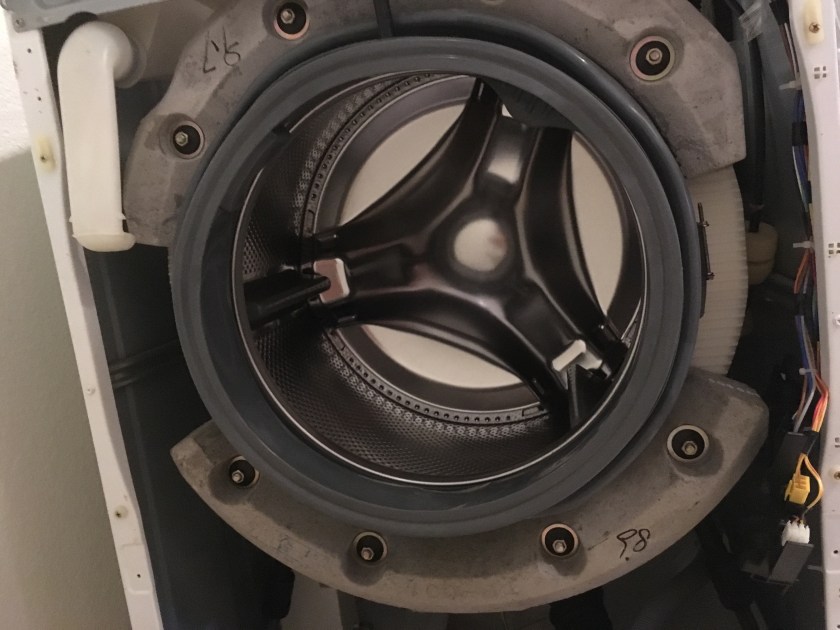
I think it went pretty much as the videos showed. Removing and reattaching the second clamp was not as easy as the videos made it look, but I went very, very slowly and it eventually worked out fine. I’m doing the first post-repair load of laundry as I write this, and I don’t see as much as a drop of water on the floor. Thank God.
The machine is fixed, it’s clean inside and out, and I finally leveled the washer after ten years of having it wobble a bit. Bonus!
The bathroom remodel continues. Monte has finished the cabinets and they look great. Next step: wall paint.

I love being in the queue!
When we bought our house we spent 3 months updating it before we moved in. Then 10 years ago we lived through a 6 month remodel. It’s time to make dust again! This time we are updating one of our bathrooms. Tile gone. 1980’s era massive 4’x9′ mirror gone. Hideous 12-ton countertop about to be gone. Monte is making new cabinet doors, and sanding and painting the cabinets and doors. One tall cabinet done, and looks great. One long cabinet is next.
We brought home the jib from Nirvana. It has several tears and wear that needs some TLC. I’m setting out to mend this 42′ x 17′ triangular mass of Dacron. Who will win? Stay tuned.

I think I’m on a roll with this boat canvas thing. I made a companionway cover for Marty & Sue’s boat. I love the color. It’s insulated, with a layer of Reflectix between two layers of marine Sunbrella. Stitching it was a bit like wrestling a bear at times, but my new machine handled it well. 🙂
One of the salon cushions on our Catalina 320 tore along a center seam. I tried mending it once and it just tore again, as the fabric had significantly weakened along the seam. I think the material is Ultrafabric Brisa Original (from around 2005). I haven’t been able to find a color match yet. It’s just as well, though, as the fabric runs around $65/yard. I’m not ready to reupholster the entire set of salon cushions yet. Soooo, what can I use for a temporary fix?
I decided to repurpose a length of Tear-Aid Type-A tape that I originally got to patch a few holes in our Sunbrella bimini skin. It should adhere well to Brisa’s polyester and rayon backing. It’s not supposed to be sewn-through, but I don’t need a waterproof seal. I simply want to use it to patch along the back-side of the rip and to strengthen and reinforce the area around the tear so I can stitch a new seam through it, about 1/4″ in from the tear.
So I gave it a shot… and I’m happy with the repair. Now I just need to wait and see how long it holds up. Fingers crossed!
Before:


And after…


If you’re interested, here’s a few pics as I tried the fix.
I removed the cover from the inner cushion pieces, and ripped out the old seam on all 3 pieces of fabric involved in the seam. The alcohol is to clean the Brisa fabric backing, where I want to apply the Tear-Aid. The hair dryer is to help me flatten out the old folded seam allowance, and also to help dry the backing after I cleaned it.

Both pieces of Brisa are torn along the old seam. I’ll need to patch both pieces in a similar fashion before trying to sew a new seam.
Tear-Aid says to clean the application area with alcohol and let dry. As I cleaned the fabric with alcohol, I saw that the backing material was rotted away in places. So I removed all the non-adhered backing along the tear. Not sure how it got in this condition. Maybe something caustic spilled here and weakened the fabric. Or maybe 15 years is all you can get out of Brisa.

After cleaning and drying the pieces of Brisa, I used scotch tape on the right side (outside) of the tear to hold the edges of the tear together, temporarily. I’ll remove it after I apply the Tear-Aid to the wrong side (inside) of the torn fabric.

I cut a length of Tear-Aid Type A tape and applied it on the backing-side of the Brisa fabric along the tears. Tear-Aid recommends leaving an inch of patch around any torn area, but I didn’t have that much of material along the old seam allowance, so I used a smaller piece than they’d probably recommend.

I removed the scotch tape from the right-side of the pieces of Brisa, and clipped the right-sides of Brisa together to prepare for stitching the new seam. This time I’ll sew THROUGH the newly applied Tear-Aid, approx 1/4″ in from the tear along the old seam.

Stitching the seam was a bit challenging, as the adhesive from the patch gummed up the needle every 6 inches or so. But, as long as I cleaned the needle each time with alcohol, it stitched pretty well. I used a ballpoint (recommended for Brisa) needle, size 16, and V-69 poly thread, and I also found I had to lower my top thread tension.
There you have it.
My latest canvas-work project… a cover for the grill off the back of the boat. Voila!
Making my own pattern was definitely the hardest part.
If Monte stands around too long in one place, I’ll make a cover for him, too!
I spent today and another day last weekend sitting in the bottom of our port-side lazerette at the stern of the boat. We lost the electronic control unit of our auto helm in a lightening strike at the marina earlier this year. We got off easy; a neighboring boat’s electronics repairs from the same strike is over $80K and counting. Marty gave us a unit that he used to have on their boat. We installed it over the course of the last two weeks. Lots of pulling of cables through tiny stainless steel tubing, making new electric connections, and squeezing into small spaces.


Marty and Sue accompanied us on the calibration run. Everything worked! It’s nice to have Otto back.
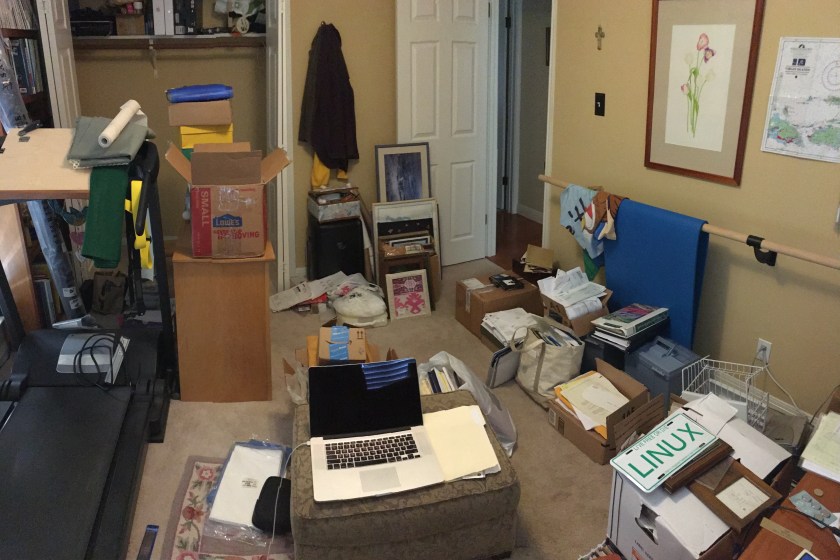
Two projects on the long to-do list that I made when I retired were:
1) purge 30 years of paperwork and de-crap the rest of the mess in the closet in my office, and
2) create a workspace in my office closet for my projects like sewing, painting, knitting, beading, photo scanning & editing, etc.
I’m ecstatic to report that I’m crossing them both off today!
I didn’t get a truly before pic. But this is a during pic (all this crap previously filled the closet).
And, (drumroll) this is the after pic:
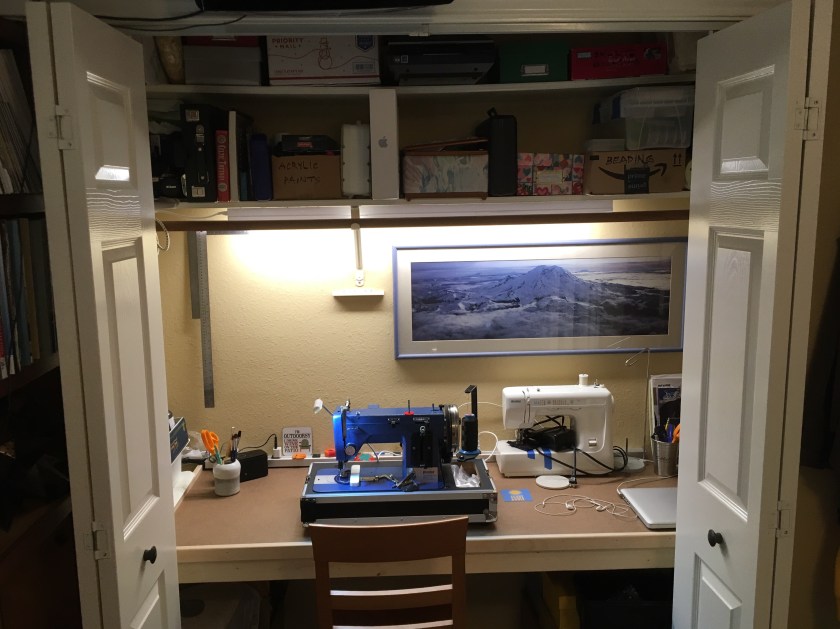
Many thanks to Monte for building and installing my new desk!
Now I just need to shred the boxes of purged papers and documents…
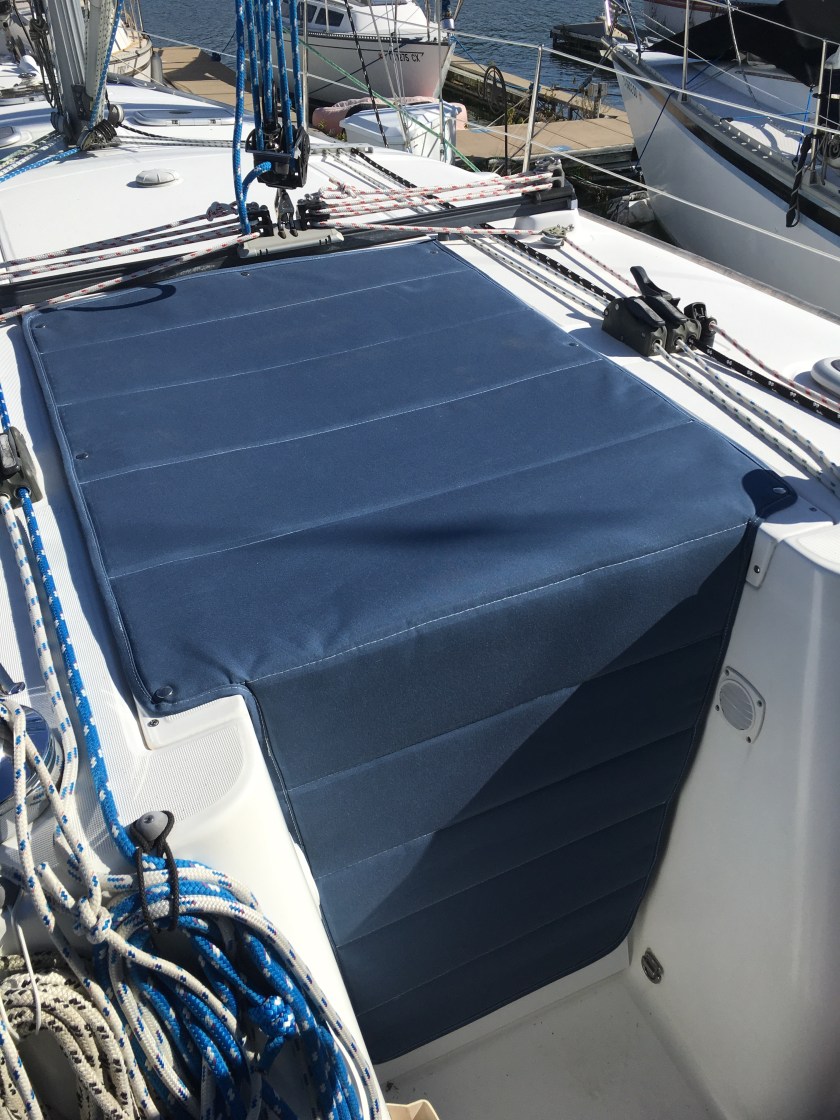
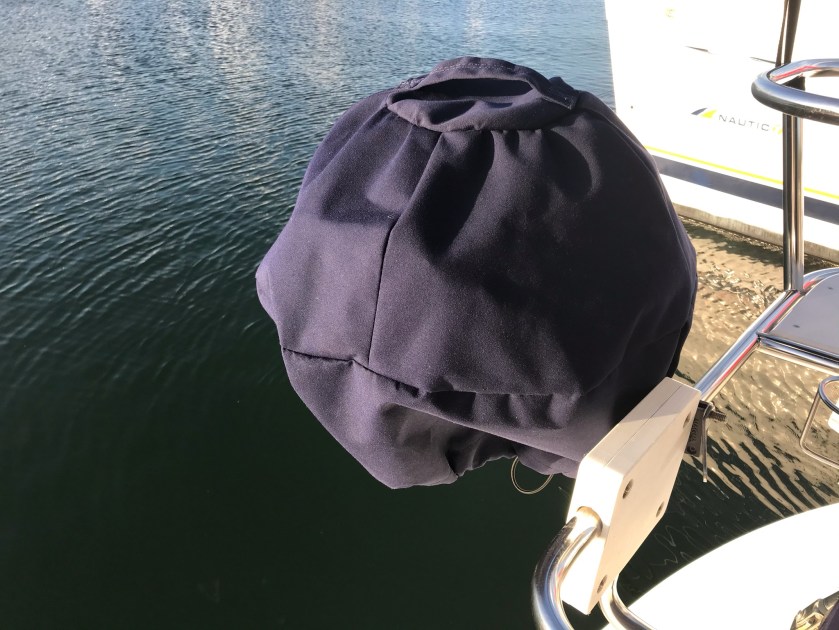
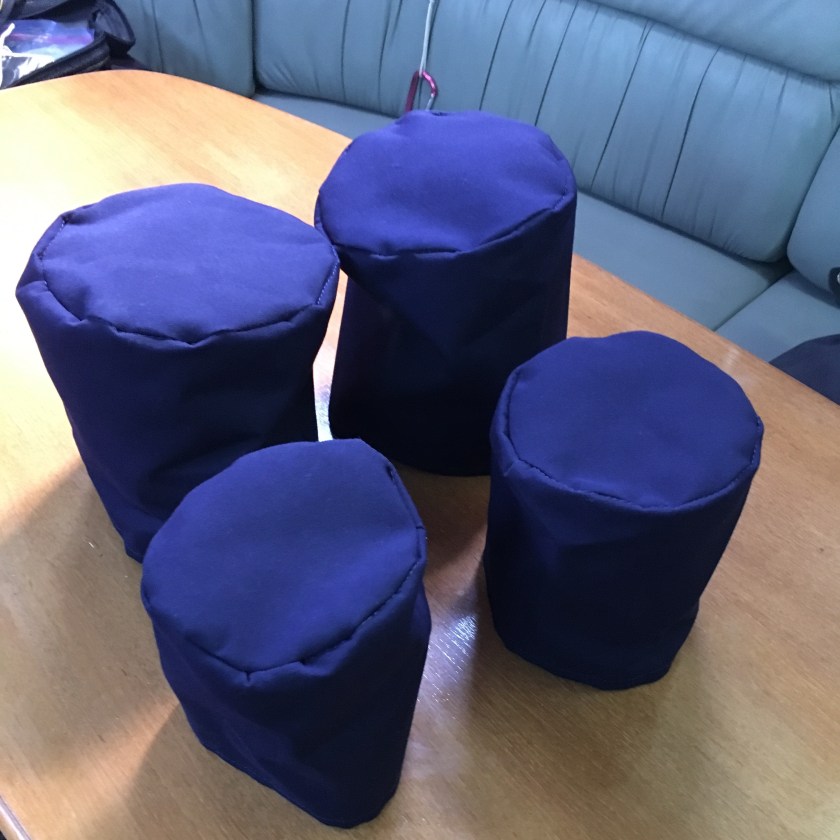
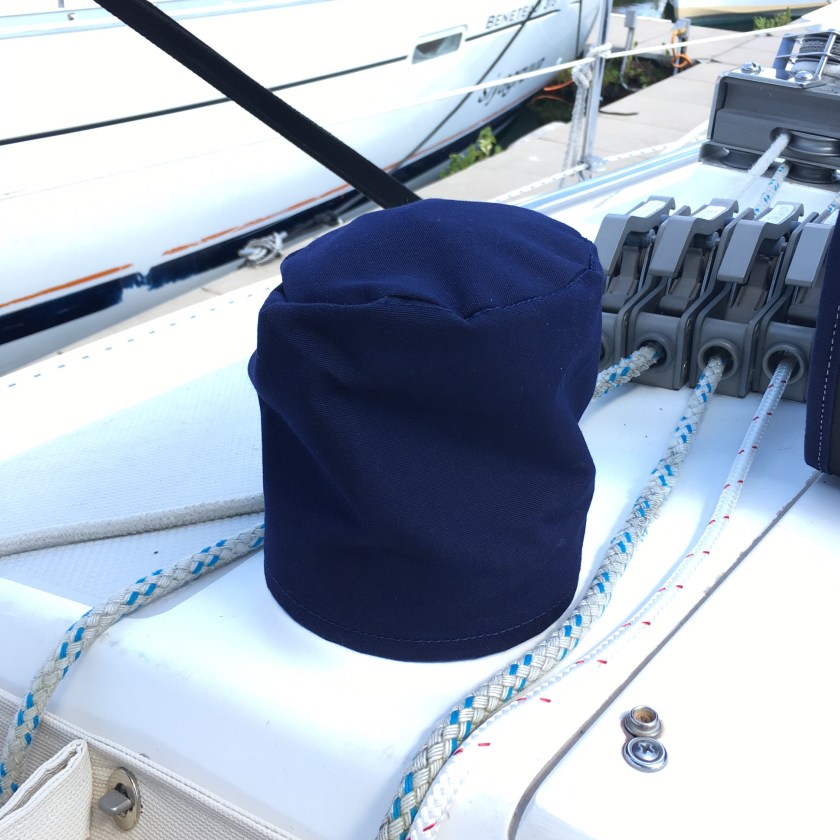
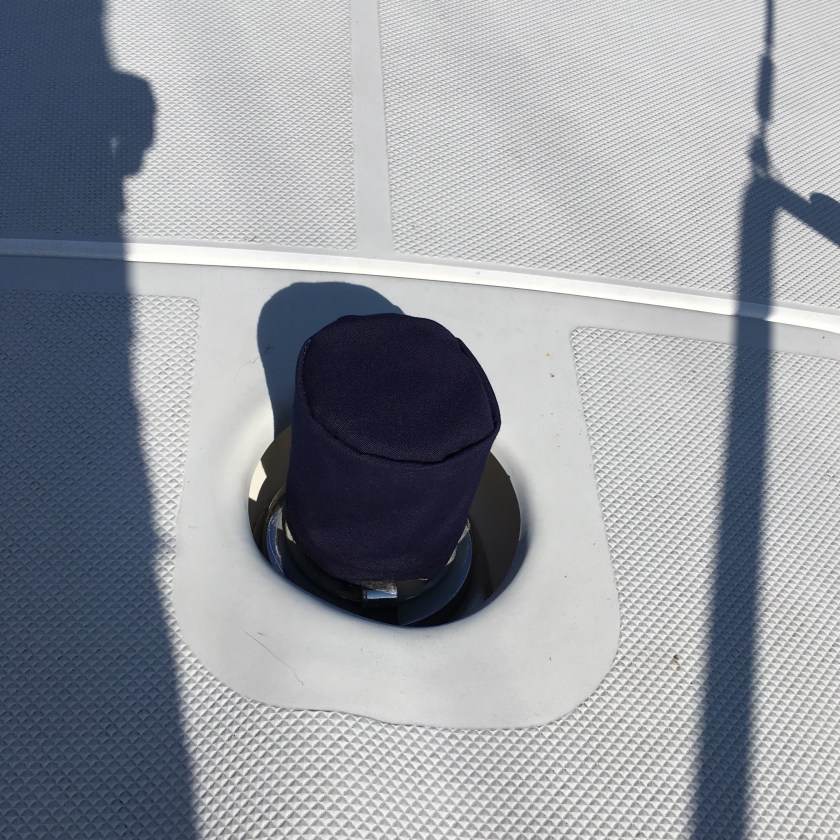
I’m slowly working down my boat sewing project list. I made 5 winch covers for our jib sheet winches, house top winches, and windlass. I used Sailrite’s pattern and instructions as a guide. My takeaway: it is not easy to sew a circle onto a rectangle.
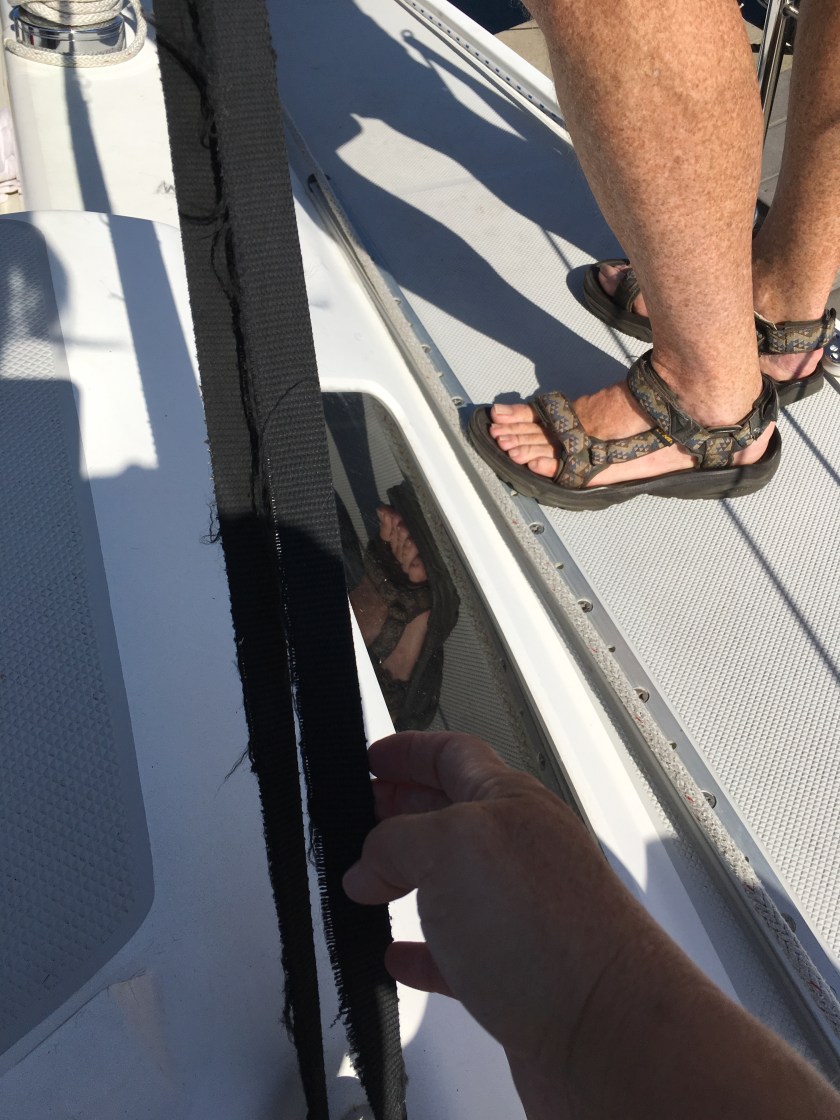
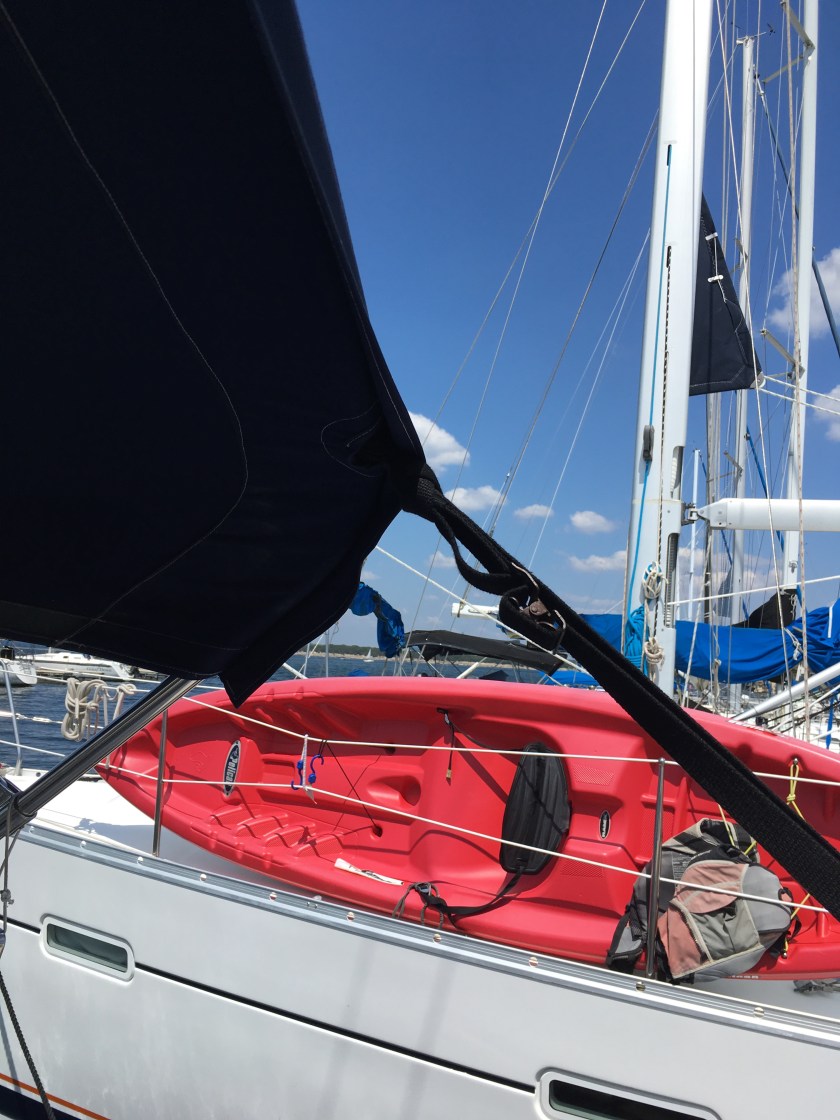
I also replaced our frayed and yucky bimini straps, having to sew a loop and attach the fastener-buckle thingie before installing.
Bring on the next project!
We have been talking about it for quite some time. Today we sprang into action! We replaced an old water heater before it failed and flooded the house.
After two trips to Home Depot (you can never, ever take one trip), draining the old tank, some heavy lifting, and a few choice phrases, we are back in business.

Thanks Sweetie!
