
A week or so ago, we were at anchor and rafted-up in a cove with another boat when we experienced the largest boat wake we have ever seen on Lake Travis, courtesy of a motorhead who is ignorant of the damage that his wake causes other boats and docks along the lake. We never saw him, but his wake caused our two boats to smash into eachother, resulting in our port-side gate stanchion breaking.
The next day I got on the phone with Catalina Direct and ordered a replacement. That was the easy part. The fun-part remained: figuring out how to access the nuts & bolts below deck to make the repair. Suffice to say that it was not a Catalina 320 design point to make access to the stanchion bolts easy or straightforward. The Catalina 320 owners’ association discussion forum was a helpful resource, with some threads describing the repair. I decided to document our experience, along with some photos, in the event it helps another sailor down the line. This is a two-person job, as screwing and unscrewing the nuts requires one person above deck, and one person below. Oh, and the below deck person needs to be small enough and able to contort his/herself in a very confined space for the duration. This repair took about 4 hours. While this post documents replacement of a port-side gate stanchion, I imagine it would be a similar experience for replacing any other stanchion, but the location will dictate a different set of steps to gain access.
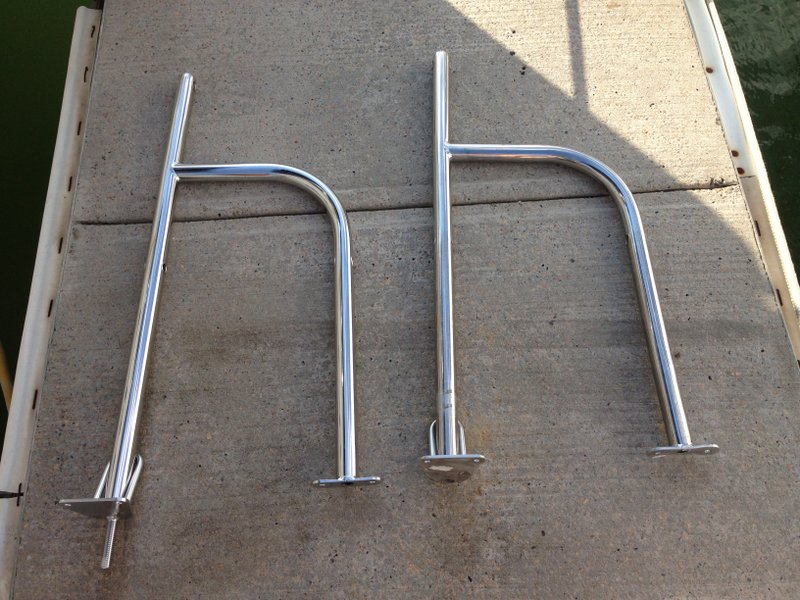
In the photo below (new part on the left, broken part on the right) you can see that the threaded rod of the port-side gate stanchion’s aft leg was broken off at the deck. It’s actually a great design, in my opinion, because even though the stanchion was bent significantly enough inboard to pop the weld on the threaded rod, there are no outboard through-deck bolts to damage the deck by being pulled out when the damage occurs. Another thing worth noting is the width of the “h” on the new stanchion was about an inch less than the old one. You can kind of see that in the photo. But we were able to remedy that by a gentle, but firm, pull on the legs to spread them enough to make the bolt holes line up with those on deck. Don’t forget to order the new nuts/bolts/washers that are recommended in the listing for the stanchion on the Catalina Direct website. They have to be ordered separately. Our old bolts were bent pretty good, and the washers were cupped a bit.
The life lines on our 320 connect forward at the bow pulpit. Easy enough to remove for the repair.

Now for the fun part. On a 320, the bolts for the aft leg of the gate stanchion are located behind the aft galley cabinet. The bolts for the forward leg are behind the middle galley cabinet, where the microwave sits. You’ll want to open both of them up to gain access. I recommend taking the divider wall between the two cabinets out as well to make maneuvering a little easier. There is a molded fiberglass cable chase/run behind the wood trim inside the cabinets. You will need to cut away part of that to access all the bolts. A previous owner of our boat had cut some of it away for some other repair or installation.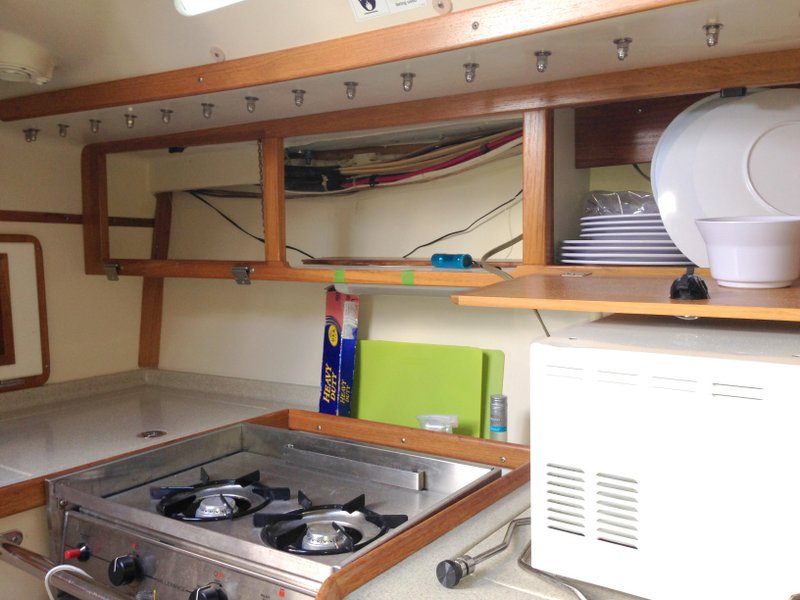
When I first opened things up to see what I could see, this is what I saw in the aft cabinet. Some of the fiberglass panel had been cut away already, but not enough for this repair.

I used a Dremel tool to cut away another 4 inches or so. BE CAREFUL to not damage the cabling behind the fiberglass panel! Also, take precautions to not work around live electric cables, to avoid damage/death to yourself. I also recommend eye protection and wearing a mask to protect yourself from breathing in the dust while making the cut. And, beware, that cut fiberglass edge is sharp.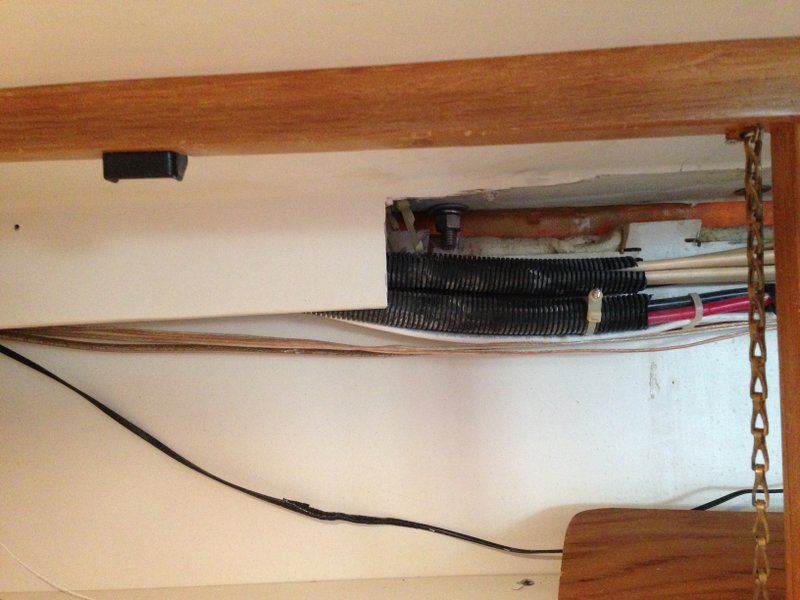
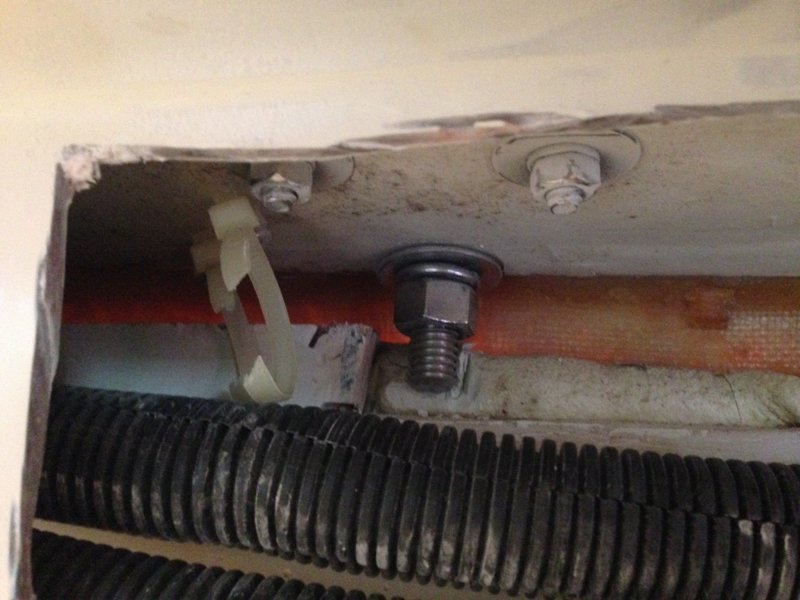
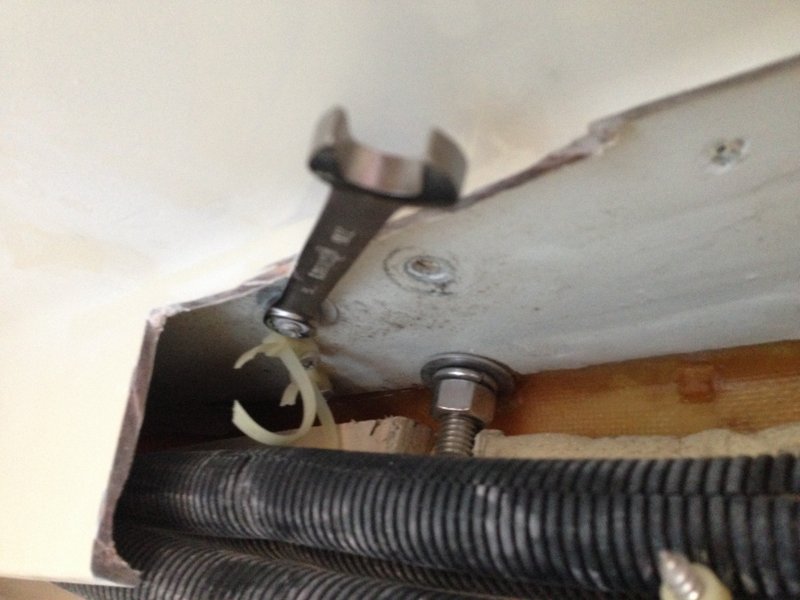
This is an upclose view of the 3 bolts for the aft leg of the gate stanchion. The big one is the broken outboard threaded rod. The 2 inboard ones are the smaller through-deck bolts for the aft leg. I had to lower the cabling that was fastened below deck to get access to the bolts. I found that there was no clearance below the threaded rod to allow me to use a socket of any kind. So I had to use a wrench to turn the nut, little by little. As I did, the top of the broken-off rod rose slowly above the deck, eventually enough to be able to put a vicegrips on it above deck, to keep it from turning as I removed the nut the rest of the way. I also will note that the recommended bolt/nut/washer kit that we ordered contained new stainless bolts for the inboard holes of the aft leg that are about an inch longer than the old ones. That might make using a socket difficult, if you don’t have a deep enough one.
This picture shows all 5 bolts – the 3 of the aft leg, and the 2 of the forward leg. It also shows how nice it is to not have the dividing wall between the cabinets there. It made reaching through with tools easier.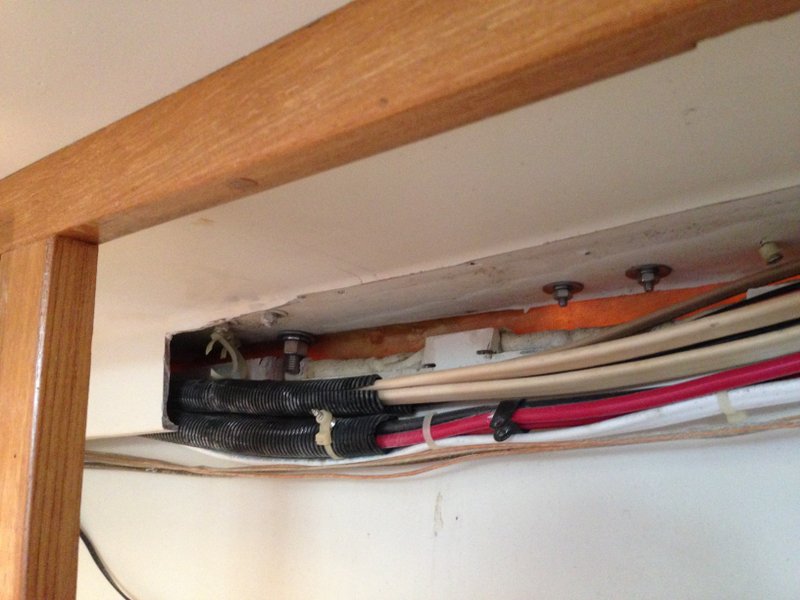
We first removed the inboard bolts of the aft leg. Monte unscrewed the bolt above deck, while I held the nut below.
This is a shot of the deck with all the bolts removed, and the old adhesive scraped away. We used fresh marine adhesive, liberally covering the area of each foot. All that remained was to install with the new hardware.

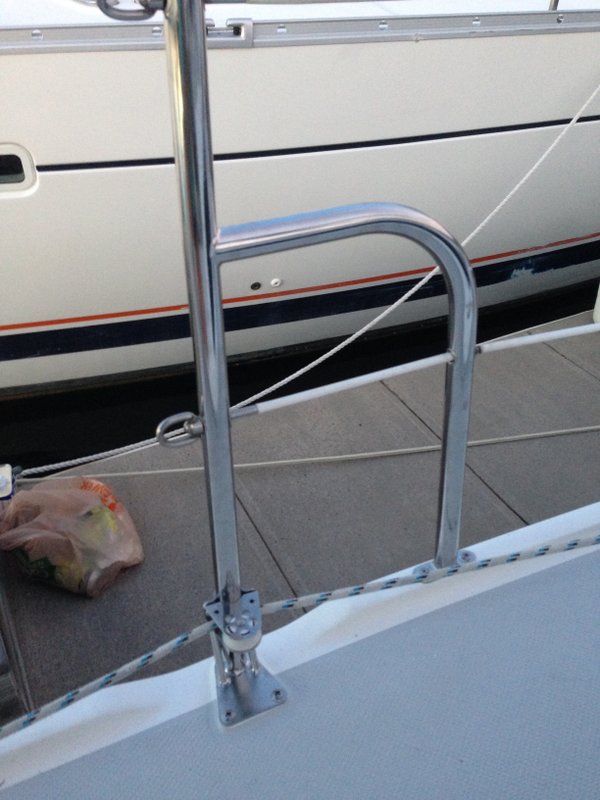
Voila! repair complete.

Your article is really useful and interesting. I have been into boating for almost 20 years now and I own a web directory about sailing as well. It would be a pleasure for me to share your site on my directory. Would you mind if I do that?